Last Updated on August 7, 2025
To clean a Solo Stove, remove ashes and debris and wipe the stove body with a damp cloth. Proper maintenance ensures longevity and optimal performance for your Solo Stove.
Whether you enjoy camping, backyard gatherings, or cozy nights by the fire, a Solo Stove offers a great way to enjoy the outdoors. However, over time, ashes and debris can accumulate, affecting the stove’s efficiency. To keep your Solo Stove in top condition, regular cleaning is necessary.
We will provide step-by-step instructions on how to clean a Solo Stove, ensuring it remains a reliable and enjoyable part of your outdoor experience. By following these simple tips, you can keep your Solo Stove clean and ready for your next adventure.
Why Cleaning Your Solo Stove Is Crucial For Optimal Performance
Regularly cleaning your Solo Stove is essential for optimal performance. Keep your stove functioning properly by following these simple steps for cleaning.
Ensuring efficient burning and heat distribution:
- Regular cleaning of your Solo Stove ensures that airflow is not obstructed, allowing for efficient burning and better heat distribution.
- A clean stove promotes better combustion, leading to more efficient use of fuel and less smoke production.
- Improved airflow helps maintain a steady flame, providing a consistent heat source for your outdoor activities.
- Preventing ash buildup in the air vents enables the stove to draw in the necessary oxygen for a strong and continuous flame.
Avoiding buildup of creosote and other harmful substances:
- Creosote is a flammable substance that can form in the chimney or flue pipe of your Solo Stove. Regular cleaning prevents its accumulation, reducing the risk of chimney fires.
- Ash and soot buildup can release harmful substances when reheated, affecting the air quality and potentially causing health hazards. Cleaning your stove eliminates these risks.
- Removing creosote and other residues also prevents the unpleasant smell that can accompany a dirty stove, ensuring a more enjoyable outdoor experience.
Extending the lifespan of your stove:
- Proper maintenance through regular cleaning helps extend the lifespan of your Solo Stove, saving you money in the long run.
- Removing ash, soot, and creosote prevents corrosion and rust from forming on the stove’s components, preserving its functionality.
- A clean stove is less prone to damage caused by excessive heat or blockages, increasing its durability and ensuring it lasts for many outdoor adventures to come.
Remember, keeping your Solo Stove clean is essential for optimal performance. By ensuring efficient burning and heat distribution, avoiding the buildup of harmful substances, and extending the lifespan of your stove, you’ll continue to enjoy its benefits while prioritizing safety and longevity.
Regular maintenance is key to maximizing your Solo Stove experience. Happy cleaning!
Materials Needed To Clean Your Solo Stove
To clean your Solo Stove, you’ll need some essential materials. Grab a soft cloth, mild dish soap, warm water, a scrub brush, and a metal polish for the stove’s exterior. Start by wiping down the surfaces with the soapy water, then use the scrub brush for tougher stains.
Finally, polish the metal to keep your Solo Stove looking brand new.
Keeping your Solo Stove clean is essential for optimal performance and longevity. With just a few simple materials, you can easily maintain your Solo Stove’s pristine condition. Here are the materials you’ll need:
- Soft-bristle brush: A soft-bristle brush is ideal for removing soot and residue from the inside and outside of your Solo Stove. Its gentle bristles won’t scratch or damage the stove’s surfaces.
- Mild dish soap: To effectively clean your Solo Stove, you’ll need a mild dish soap. This soap will help break down grease and grime without causing any harm to the stove’s materials. Make sure to choose a gentle formula to avoid leaving behind any residue.
- Water: Having access to water is essential for the cleaning process. You’ll need it to rinse off the soap and remove any remaining dirt or stains. A steady stream of water will help ensure a thorough cleaning.
- Lint-free cloth: When drying your Solo Stove after cleaning, a lint-free cloth is the best option. It won’t leave any fibers or lint behind, allowing you to achieve a spotless finish. The cloth should be soft and absorbent to ensure efficient drying.
- Paper towels: During the cleaning process, having paper towels on hand is useful for various tasks. They can be used to wipe down larger surfaces, soak up excess moisture, or clean hard-to-reach areas. Paper towels provide convenience and are easily disposable.
With these materials in your cleaning arsenal, you’ll have everything you need to maintain the cleanliness and functionality of your Solo Stove. Follow the subsequent steps to ensure a thorough cleaning process and maximize the lifespan of your stove.
Step-By-Step Guide To Cleaning The Outside Of Your Solo Stove
Learn how to clean the exterior of your Solo Stove with this easy-to-follow step-by-step guide. Keep your Solo Stove looking great and performing at its best with these simple cleaning tips.
Cleaning the exterior of your Solo Stove is an essential part of its maintenance routine. With regular cleaning, you can keep your stove looking new and performing optimally. Here’s a step-by-step guide to help you clean the outside of your Solo Stove.
Removing Loose Dirt And Debris:
- Start by removing any loose dirt and debris from the exterior of your Solo Stove. This can be done using a soft brush or a cloth. Be sure to get into all the nooks and crannies to remove any trapped dirt.
- A quick tip: You can also use a vacuum cleaner with a brush attachment to effectively remove loose dirt and debris.
Using Mild Dish Soap And Water To Scrub The Exterior:
- Fill a bucket with warm water and add a small amount of mild dish soap. Mix it well to create a soapy solution.
- Dip a sponge or a soft cloth into the soapy solution and gently scrub the exterior of your Solo Stove. Pay attention to any areas that may have accumulated grime or stains.
- If there are stubborn stains, you can use a non-abrasive scrub brush to gently scrub the affected areas.
Rinsing And Drying The Stove:
- Once you have scrubbed the exterior, rinse the stove thoroughly with clean water. Ensure that all the soap residue is completely washed off.
- After rinsing, use a clean towel or cloth to dry the stove. Be thorough in drying, especially around any joints or seams to prevent any potential rusting.
Polishing The Metal Surfaces For Added Shine:
- To give your Solo Stove’s metal surfaces that extra shine, you can use a metal polish specifically designed for stainless steel or other metal types.
- Apply a small amount of the metal polish onto a soft cloth and gently polish the exterior of the stove in a circular motion. This will help remove any minor scratches and bring out the shine.
- Don’t forget to follow the manufacturer’s instructions for the metal polish you choose.
Regularly cleaning the outside of your Solo Stove not only helps it look great, but it also helps prolong its lifespan. By following these simple steps, you can keep your stove in top shape and ready for your next outdoor cooking adventure.
Happy cleaning!
Credit: www.si.com
Step-By-Step Guide To Cleaning The Burn Chamber
Get a step-by-step guide on how to effectively clean the burn chamber of your Solo Stove. Follow these instructions to keep your Solo Stove clean and in great working condition.
Letting The Stove Cool Down Completely Before Cleaning
- Before you begin cleaning the burn chamber of your Solo Stove, it is crucial to let the stove cool down completely to avoid any burns or injuries.
- Allow the stove to cool for at least 30 minutes before proceeding with the cleaning process.
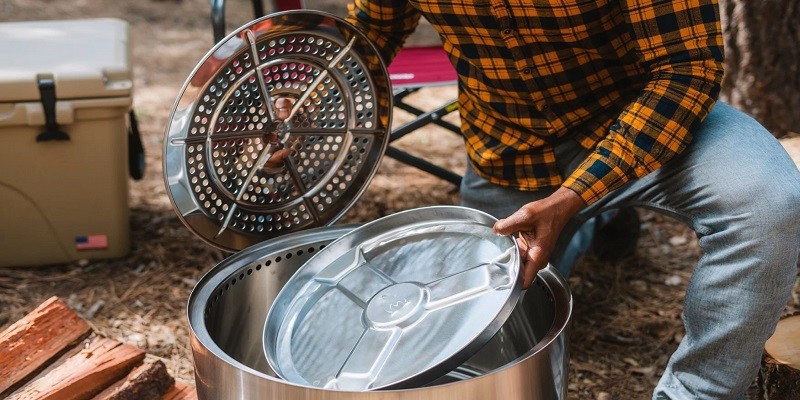
Removing Ashes And Residue From The Burn Chamber
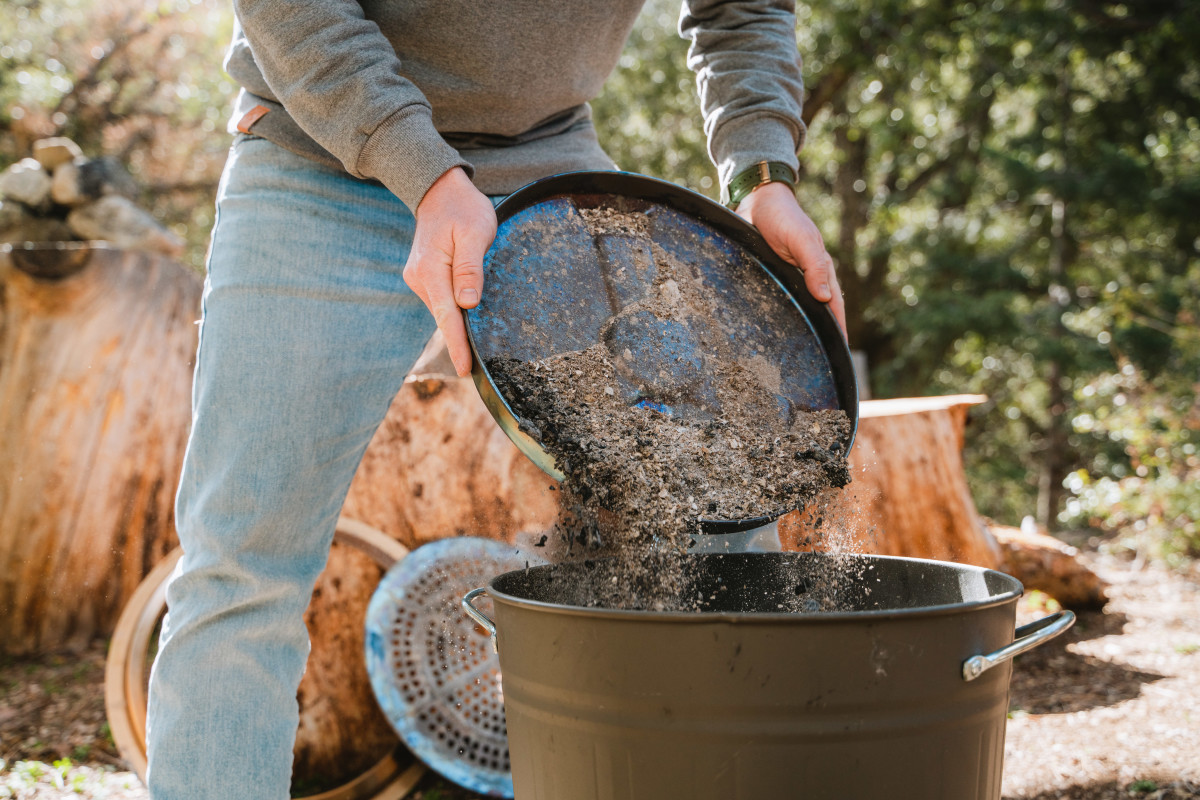
- Once the stove has cooled down, carefully remove the ashtray or collection chamber from the bottom of the burn chamber.
- Dispose of the ashes in a safe and appropriate manner, ensuring that they are fully extinguished.
- Use a scoop or a small handheld brush to remove any loose ashes or residue from the burn chamber.
- Be gentle and thorough, ensuring that all debris is removed.
Using A Soft-Bristle Brush To Scrub Any Stubborn Buildup
- If there are any stubborn residue or soot buildup in the burn chamber, use a soft-bristle brush to gently scrub the affected areas.
- Make sure to cover all the surfaces inside the burn chamber, paying extra attention to corners and crevices.
- Avoid using harsh abrasive substances or metal brushes, as they may damage the stove’s finish or cause scratches.
Wiping Down The Inside With A Lint-Free Cloth
- After removing the ashes and scrubbing any stubborn buildup, take a lint-free cloth and dampen it with warm water.
- Wipe down the inside walls of the burn chamber, removing any remaining residue or ash.
- Rinse the cloth as needed and continue wiping until the walls are clean and free from any debris.
- Make sure to dry the burn chamber thoroughly before reassembling the stove.
Remember, regular cleaning and maintenance of your Solo Stove burn chamber will not only prolong its lifespan but also ensure optimal performance during your outdoor adventures. So, make it a habit to clean your Solo Stove after each use for the best camping experience!
Tips For Keeping The Air Vents Clean And Clear
Learn effective tips and techniques for cleaning your Solo Stove air vents, ensuring optimal performance and longevity of your stove. Keep your vents clean and clear to enhance airflow and prevent blockages, helping your stove to burn efficiently and effectively.
Regularly inspecting the air vents for obstructions:
- Check the air vents of your Solo Stove regularly to ensure they are clear of any debris or obstructions.
- Look for any leaves, twigs, or other debris that may have accumulated and remove them.
- Inspecting the vents regularly will help maintain proper airflow and improve the efficiency of combustion.
Using a small brush or compressed air to remove debris:
- Use a small brush, like a toothbrush, to gently scrub away any dirt or debris from the air vents.
- Ensure that you brush in the direction of the vent to prevent pushing debris further into the stove.
- Another option is to use compressed air to blow away any loose particles from the vents.
Avoiding the use of water or cleaning agents on the vents:
- It’s important to note that water and cleaning agents should not be used to clean the air vents of your Solo Stove.
- The vents are designed to withstand high temperatures and exposure to water or cleaning agents may damage them.
- Instead, rely on dry cleaning methods like brushing or using compressed air to keep the vents clean.
Ensuring proper airflow for efficient combustion:
- Unblock and clear the air vents to maintain proper airflow, which is crucial for efficient combustion.
- Adequate airflow helps the fire breathe and burn more efficiently, ensuring cleaner and more effective burning of fuel.
- By keeping the air vents clear, you’ll enhance the overall performance of your Solo Stove and enjoy a better outdoor cooking experience.
Frequently Asked Questions For How To Clean A Solo Stove?
How Do You Clean The Ashes Out Of A Solo Stove?
To clean the ashes out of a Solo Stove, wait until it has cooled completely. Then, simply remove the top part and carefully scoop out the ashes into a heat-resistant container. Ensure that none of the ashes are hot or smoldering before disposing of them properly.
You can use a small shovel, tongs, or an ash removal tool specifically designed for Solo Stoves for easier cleaning. Avoid using water or any liquid to clean the ashes, as it can lead to corrosion. Once all the ashes have been removed, you can wipe down the inside of the Solo Stove with a damp cloth to remove any remaining residue.
Regularly cleaning the ashes from your Solo Stove will help maintain its efficiency and prolong its lifespan.
Can You Clean The Inside Of A Solo Stove?
Yes, the inside of a Solo Stove can be cleaned. To clean it, follow these steps: 1. Allow the stove to cool completely. 2. Remove any remaining ash or debris with a brush or vacuum. 3. Wipe down the inside of the stove with a damp cloth or sponge.
4. For stubborn stains, use mild soap or stove cleaner. 5. Rinse and dry the inside thoroughly before using again. Regular cleaning of the inside of your Solo Stove helps maintain its performance and prolong its lifespan.
Does Solo Stove Need To Be Cleaned Out?
Yes, Solo Stove needs to be cleaned out. Regular cleaning ensures proper functionality and longevity.
Why Is My Solo Stove Turning Brown?
Solo Stove turns brown due to the natural oxidation process of stainless steel when exposed to heat. The intense heat generated during use leads to discoloration. This is normal and does not affect the stove’s performance or durability. The brown color can be removed by cleaning the stove with a non-abrasive stainless steel cleaner or a mild soap solution.
Wiping the stove with a soft cloth or sponge and avoiding abrasive materials will help maintain its original appearance.
Conclusion
Cleaning your Solo Stove is essential for maintaining its performance and extending its lifespan. Regular cleaning not only ensures that you can enjoy clean-burning fires but also prevents any buildup that may hinder its efficiency. To clean your Solo Stove effectively, start by removing the ashes and debris from the fire pit.
Use a soft bristle brush to scrub away any remaining residue and then rinse the stove thoroughly with water. Avoid using harsh chemicals or abrasive scrubbers that could damage the stove’s materials. Once clean, make sure to let the stove dry completely before storing it or using it again.
By following these simple steps, you can keep your Solo Stove in top condition for years to come. Happy cleaning and happy camping!