Last Updated on August 7, 2025
To clean a blue crab, start by removing its top shell and gills, then clean out the guts and rinse it thoroughly. In order to clean a blue crab, you will need to remove the top shell and gills, clean out the guts and rinse it well.
Blue crabs are a popular seafood delicacy known for their sweet meat and culinary versatility. Whether you are catching them yourself or buying them from a seafood market, knowing how to properly clean them is essential. Cleaning a blue crab involves a few simple steps, and with a little practice, you will be able to enjoy fresh, delicious crab meat in no time.
We will guide you through the process of cleaning a blue crab to ensure you get the most out of your seafood experience.
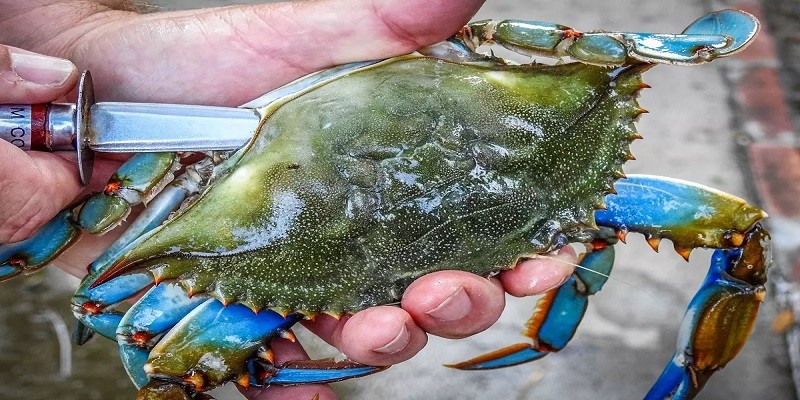
Credit: www.thefisherman.com
Why Cleaning A Blue Crab Is Essential
Cleaning a blue crab is essential for a delicious meal. Learn how to clean a blue crab easily with our step-by-step guide.
The Importance Of Cleaning Blue Crabs For Optimal Taste And Texture
Cleaning a blue crab is an essential step that cannot be overlooked if you want to enjoy the best taste and texture from this delectable seafood. Properly cleaning the crab not only ensures that you remove any undesired elements but also enhances the overall flavor and eating experience.
Here are a few reasons why cleaning blue crabs is crucial:
- Removal of unwanted parts: Blue crabs come with some parts that are not desirable or safe to eat. Cleaning the crab allows you to eliminate these unwanted parts, such as the gills, stomach, and lungs, which can affect the flavor of the meat.
- Preservation of freshness: Cleaning the blue crab immediately after catching or purchasing it helps preserve its freshness. This ensures that you savor the crab at its peak flavor and prevents any potential spoilage.
- Enhancing taste and texture: By cleaning blue crabs, you improve the taste and texture of the meat. Removing the shell and cutting the crab into smaller pieces allows the seasoning and flavors to penetrate the meat, resulting in a more flavorful and tender bite.
- Reducing cooking time: Cleaning the blue crab beforehand saves you cooking time. It allows the heat to reach the meat more effectively, reducing the overall cooking time required. This ensures that the crab remains moist and succulent instead of overcooking.
- Eliminating impurities and odors: Cleaning the blue crab can help get rid of any impurities, sand, or mud that may be present on the shell. It also helps eliminate any undesirable odors, ensuring a clean and fresh dining experience.
- Easier removal of meat: Properly cleaning a blue crab makes it easier to extract the meat. Removing the shell and cleaning the crab beforehand simplifies the process, allowing you to enjoy the succulent meat with less effort.
Cleaning blue crabs is an essential step to achieve the best taste and texture from this sought-after seafood. By removing unwanted parts, preserving freshness, enhancing flavor and texture, reducing cooking time, eliminating impurities and odors, and facilitating meat removal, cleaning ensures a delightful culinary experience.
So, let’s dive in and learn how to clean a blue crab properly.
Tools And Equipment Needed For Cleaning Blue Crabs
Cleaning blue crabs requires specific tools and equipment, including a sharp knife, cutting board, kitchen shears, and gloves. With these items, you can easily remove the crab’s outer shell and clean the meat for cooking.
Blue crabs are a delicious seafood option enjoyed by many. If you’re a fan of blue crabs and want to try your hand at cleaning them yourself, then you’ll need some essential tools and equipment to get the job done effectively.
Creating the right workspace is also crucial to ensure a smooth and efficient cleaning process. In this section, we’ll discuss the necessary tools and how to set up your workspace for cleaning blue crabs.
Essential Tools For Cleaning Blue Crabs Effectively:
- Crabbing gloves: These will protect your hands from the crab’s sharp claws and ensure a firm grip while cleaning.
- Crabbing knife: A good quality knife with a sharp and sturdy blade is essential for cleaning blue crabs. It will help you remove the top shell (carapace) and cut through the legs.
- Crabbing scissors: These specialized scissors will assist in cutting through the crab’s hard shell and breaking it into smaller pieces for easier cleaning.
- Crabbing board: A crabbing board provides a stable surface to hold the crab and prevents it from slipping while you clean. Look for one with raised edges to contain any juices or pieces that may scatter during the process.
- Crabbing mallet: Sometimes, you may need to crack the hard shell of the blue crab to access the meat within. A crabbing mallet comes in handy for this task.
How to properly set up your workspace for cleaning blue crabs:
- Clean and sanitize your workspace: Before you begin, ensure that your cleaning area is clean and sanitized. This will help maintain the freshness and quality of the crab meat.
- Use a large cutting board: Blue crabs can be messy to clean, with juices and pieces flying around. A large cutting board provides enough space for you to work without making a mess.
- Arrange your tools within reach: Keep all your cleaning tools within easy reach to avoid unnecessary movement and interruptions during the process.
- Prepare a waste disposal system: Have a designated waste disposal area nearby to discard the discarded shells and other waste. This will help keep your workspace tidy and organized.
- Have a bowl of fresh water: Keep a bowl of fresh water nearby to rinse off any residue or impurities from the crabs during the cleaning process. This will ensure that you’re working with clean crab meat.
By having the necessary tools and setting up your workspace properly, you can efficiently clean blue crabs and enjoy their delicious meat. Now let’s move on to the next section and learn how to clean blue crabs step-by-step.
Step 1: Handling And Preparing Blue Crabs For Cleaning
Learn how to handle and prepare blue crabs for cleaning in just a few easy steps. This guide will help you efficiently clean a blue crab and get it ready for cooking or enjoy it as a delicious seafood treat.
How To Safely Handle Live Blue Crabs
Handling live blue crabs requires a few important steps to ensure safety and minimize any harm to the crabs or yourself. Here’s how you can handle live blue crabs properly:
- Always approach live blue crabs with caution and respect, as they have sharp claws that can pinch.
- Use gloves or a towel to protect your hands from any potential pinches or cuts.
- Hold the crab firmly but gently, grasping it from the back with your thumb on top and your fingers underneath.
- Avoid grabbing the crab’s legs or claws to prevent injury.
- Keep the crab away from your body, ensuring that it cannot reach you or escape.
Tips For Preparing Blue Crabs Before Cleaning
Properly preparing blue crabs before cleaning makes the process smoother and ensures the best results. Consider the following tips:
- Before cleaning, it is essential to ensure that the crabs are no longer alive. A quick and humane method is to place them in the freezer for about 20 minutes.
- Rinse the crabs thoroughly with fresh water to remove any dirt or debris from their shells.
- Use a stiff brush or toothbrush to scrub the shells gently, removing any loose particles or barnacles.
- Some prefer to remove the crab’s claws before cleaning to make the process easier. This step is optional and depends on personal preference.
- If you choose to remove the claws, twist them off gently but firmly at the joints, using a separate twisting motion for each claw.
Remember, taking proper care and handling of live blue crabs ensures their well-being and helps make the cleaning process more efficient. Stay tuned for the next steps on how to clean a blue crab!
Step 2: Removing The Top Shell (Carapace) Of The Blue Crab
To clean a blue crab, the second step is removing the top shell or carapace. Carefully follow this method for a perfectly cleaned crab.
Blue crabs are a delicious seafood delicacy enjoyed by many seafood lovers. If you want to learn how to clean a blue crab properly, you’ve come to the right place. In this step-by-step guide, we will focus on removing the top shell, also known as the carapace, of the blue crab.
It’s essential to remove this outer shell to access the tasty crabmeat hidden inside. By following these instructions, you’ll be able to crack the carapace open and get to the succulent meat without any hassle.
A Detailed Guide On Cracking The Carapace:
To remove the top shell of a blue crab, you need to follow these steps:
- Locate the backfin: Flip the blue crab over, with its belly facing up. Look for a pointed triangular shape in the center of the crab’s backfin.
- Insert your fingers: Gently and firmly insert your thumb and index finger into the triangle, gripping firmly but being cautious not to damage the meat.
- Apply pressure: Apply steady pressure with your fingers in the upward direction until you feel the carapace crack. Be careful not to exert too much force to avoid crushing the meat underneath.
- Separate the top shell: Once you’ve successfully cracked the top shell, use your fingers to separate it from the body. Slowly and carefully lift it away, revealing the inner cavity of the crab.
- Remove any remaining shell fragments: Before proceeding to clean the crabmeat, make sure to remove any shell fragments that may have detached during the process. This step ensures you have a shell-less and meat-focused blue crab.
Tips For Removing The Carapace Without Damaging The Crabmeat:
When removing the carapace, it’s crucial to handle the blue crab with care to preserve the delicate meat inside. Here are some helpful tips to ensure you can cleanly remove the top shell without damaging the crabmeat:
- Maintain a gentle grip: Avoid using excessive force when cracking the carapace to prevent breaking or squishing the meat. A gentle, controlled grip is key.
- Be cautious around the joints: Take extra care when separating the shell from the body around the crab’s joints. These areas are more delicate, and the meat is easily damaged.
- Use a twisting motion: Besides applying upward pressure, a slight twisting motion can assist in loosening the carapace from the body. This technique can make the removal process smoother.
- Inspect for fragments: After removing the top shell, inspect the crab for any remaining shell fragments. These can get stuck in the meat and ruin your dining experience. Remove them carefully before proceeding.
Remember, practice makes perfect. With some patience and a little practice, you’ll become adept at cracking the carapace and effortlessly removing the top shell of a blue crab. Once you’ve succeeded in this step, you’re one step closer to enjoying the delectable meat that awaits inside.
So, let’s move on to the next stage of cleaning and preparing your blue crab for a delicious meal.
Step 3: Cleaning And Removing The Gills And Viscera Of The Blue Crab
In step 3 of cleaning a blue crab, you need to carefully remove the gills and viscera. Follow these guidelines to ensure proper cleaning.
Step 3: Cleaning And Removing The Gills And Viscera Of The Blue Crab
Cleaning a blue crab involves more than just cracking the shell. It’s essential to properly clean the gills and remove the viscera to ensure a delicious and safe meal. Follow these step-by-step instructions to tackle this important process:
How To Properly Clean The Gills Of A Blue Crab:
The gills, also known as “dead man’s fingers,” are inedible and should be removed before cooking. Here’s how:
- Grab the crab firmly, turning it over to expose the belly.
- Locate the triangular-shaped opening, which is the crab’s apron.
- Lift the apron gently and snap it back; this will release the gill chambers.
- Peel away the gill chambers on each side, removing them completely.
- Rinse the crab under cold running water to ensure all the gills are discarded.
A Step-By-Step Process For Removing The Viscera:
Properly removing the viscera, or internal organs, is crucial for the crab’s taste and safety. Follow these steps to clean the blue crab:
- Flip the crab over again to expose the bottom shell, known as the carapace.
- Locate the small, pointed flap near the crab’s mouth, called the rostrum.
- Lift the rostrum gently and pull it away from the body to reveal the crab’s abdominal chamber.
- Carefully scoop out the viscera using a spoon or your fingers, being cautious not to rupture the organs.
- Remove all the internal organs, including the yellowish “mustard” and other debris.
- Thoroughly rinse the crab under cold running water to ensure it is clean.
Cleaning the gills and removing the viscera might seem like a daunting task, but once you’ve done it a few times, it becomes a routine part of preparing blue crab. Remember to handle the crab with care and wash your hands thoroughly afterward to maintain cleanliness.
With these steps mastered, you’ll be one step closer to enjoying a delectable blue crab feast.
Step 4: Final Cleaning And Rinsing For Blue Crab
After completing the first three steps of cleaning a blue crab, the final step involves thorough cleaning and rinsing. This ensures that the crab is free from any impurities or dirt before cooking.
Step 4: Final Cleaning And Rinsing For Blue Crab
After the initial cleaning and removing the gills and apron, it’s essential to ensure that the blue crab is thoroughly cleaned. This step is crucial to remove any remaining dirt or impurities. Here’s how you can do it:
- Remove loose shell debris: Gently brush the crab with a soft-bristle brush or use your fingertips to remove any loose pieces of shell. This will help get rid of any unwanted particles on the crab’s surface.
- Inspect for remaining impurities: Carefully inspect the crab’s body and legs for any lingering impurities such as sand, grit, or barnacles, as these can affect the taste and texture of the meat.
- Rinse under cold running water: Place the crab under cold running water to rinse off any remaining impurities. Make sure to direct the water over the body and in between the legs to thoroughly clean every part.
- Pay attention to the joints: Focus on the joints, where impurities often accumulate. Gently rub the joints while holding the crab under the running water to ensure a thorough cleaning.
- Use a kitchen brush, if needed: If there are stubborn impurities that won’t come off with water alone, use a clean kitchen brush to gently scrub those areas. Be careful not to damage the delicate crab meat while doing so.
- Pat dry with a clean towel: Once the cleaning is complete, pat the crab dry with a clean kitchen towel. This will remove any excess moisture and prepare it for cooking or freezing.
Properly rinsing the blue crab is equally important in maintaining its freshness and taste. Follow these tips to ensure an effective rinsing process:
- Use cool, clean water: Always use cool, clean water to rinse the blue crab. This helps maintain the quality of the meat and prevents it from becoming overly saturated.
- Avoid using soap or detergent: Do not use soap or detergent to clean the crab, as it can leave behind unwanted residues and affect the flavor. Stick to plain water for rinsing.
- Pay attention to hard-to-reach areas: Take extra care to rinse hard-to-reach areas like crevices and joints. These areas are prone to trapping impurities and should be thoroughly rinsed.
- Rinse multiple times, if needed: If you notice any remaining impurities after the first rinse, repeat the process until the water runs clear. This ensures that the crab is properly cleaned and ready for preparation.
Cleaning and rinsing the blue crab properly is essential for a delicious dining experience. By following these steps, you can ensure that your blue crab is thoroughly cleaned, free from impurities, and ready to be cooked or preserved.
Frequently Asked Questions For How To Clean A Blue Crab?
How Do You Clean A Blue Crab?
To clean a blue crab, start by removing the claws and apron, then rinse it thoroughly before cooking.
What Is The Best Method For Cleaning Blue Crabs?
The best method for cleaning blue crabs involves removing the shell, cleaning out the insides, and rinsing them under cold water.
Can You Eat The Yellow Substance Inside A Blue Crab?
Yes, the yellow substance inside a blue crab, known as crab butter or tamale, is considered a delicacy and can be eaten.
Do You Need To Cook Blue Crabs Before Cleaning?
No, blue crabs can be cleaned alive, but it is recommended to cook them shortly after cleaning for the best taste and texture.
How Long Does It Take To Clean A Blue Crab?
Cleaning a blue crab can take about 5-10 minutes, depending on your experience and the size of the crab.
Conclusion
Learning how to clean a blue crab is a valuable skill for seafood enthusiasts. By following these step-by-step instructions, you can ensure a delicious and safe dining experience. Start by establishing a clean workspace and gathering the necessary tools. Then, gently remove the top shell and discard the gills and other inedible parts.
Rinse the crab under cold water to remove any excess debris. Finally, break the crab in half and remove the meat from the body and claws. Remember to clean up properly after the process to maintain a hygienic environment. Whether you plan on steaming, boiling, or grilling your blue crab, the cleaning process is a crucial first step to enjoy its sweet and succulent flesh.
With these techniques in hand, you’ll be ready to impress your guests with your culinary skills and satisfy your seafood cravings.