Last Updated on September 10, 2023
To clean a deer skull, start by removing excess flesh and tissue, then soak it in a mixture of water and hydrogen peroxide. In a well-ventilated area, brush off remaining debris and whiten the skull using a bleach solution.
Rinse thoroughly and allow it to dry before handling or display. Cleaning a deer skull is an essential step in preserving and displaying the skull as a trophy or for aesthetic purposes. By following a few simple steps, you can effectively clean a deer skull to ensure its longevity and visual appeal.
Whether you are a hunter looking to preserve your trophy or simply interested in a unique piece for decoration, understanding the process of cleaning a deer skull is crucial. In this guide, we will provide you with a step-by-step approach to clean a deer skull, ensuring it is free from flesh, debris, and any unpleasant odors. By utilizing simple household items and following proper techniques, you can achieve a clean and visually striking deer skull that you can proudly showcase.
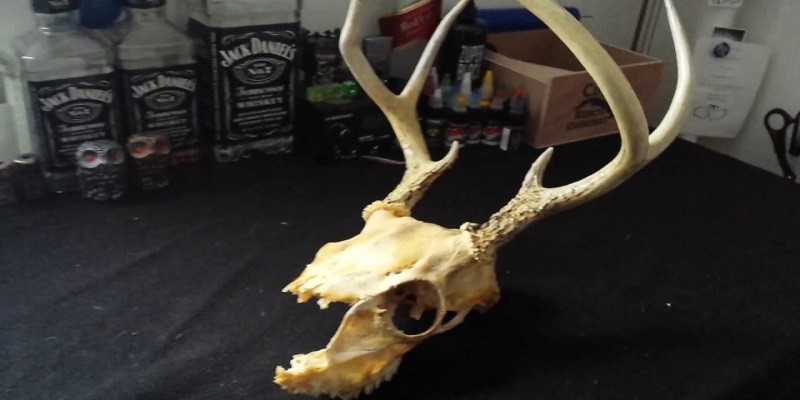
Credit: www.bowhunting.com
Preparing The Skull For Cleaning
Learn how to clean a deer skull by effectively preparing it for cleaning. Follow these simple steps to ensure a successful and thorough cleaning process.
Removing The Flesh From The Skull:
- Start by wearing protective gloves to avoid any direct contact with the flesh.
- Use a sharp knife or scalpel to carefully remove the majority of the flesh from the skull.
- Take your time and work slowly to ensure you don’t damage the bone structure.
- Pay attention to hard-to-reach areas such as around the eye sockets and nasal cavity.
- For stubborn remaining flesh, you can use a wire brush or toothbrush to gently scrub it away.
- Remember to be cautious not to scratch or damage the bone surface.
Rinsing The Skull:
- Once you’ve removed the flesh, rinse the skull thoroughly to get rid of any remaining blood, tissue, or dirt.
- Use a hose or a bucket of water to wash off the debris from the skull.
- If necessary, you can add a mild detergent or dish soap to the water for better cleaning.
- Scrub the skull gently using a soft-bristle brush or toothbrush, paying attention to crevices and hard-to-reach areas.
- Continue rinsing until the water runs clear and the skull appears clean.
- Make sure to remove any soapy residue by rinsing the skull again with clean water.
Degreasing The Skull:
- After cleaning the skull, it’s important to remove any remaining grease and fats.
- Fill a container with a degreasing agent such as hydrogen peroxide or ammonia.
- Submerge the skull in the degreasing solution, making sure it is fully covered.
- Let the skull soak for a period of time, typically around 24 to 48 hours.
- Periodically check the skull and stir the solution to ensure all areas are degreased.
- After the designated time, remove the skull from the solution and rinse it thoroughly with clean water.
- Allow the skull to air dry completely before moving on to any further steps.
Remember, proper skull cleaning requires patience and attention to detail. By following these steps and taking care during the process, you can ensure a clean and well-prepared deer skull for display or other purposes.

Bleaching The Skull
Learn the step-by-step process of cleaning a deer skull with bleaching methods. This guide will give you all the information you need to effectively achieve a clean and white skull.
Cleaning and bleaching a deer skull is an essential step in preserving it as a trophy or decorative piece. Bleaching helps to brighten the skull and remove any remaining stains. To achieve the best results, follow these steps:
Choosing The Right Bleaching Agent
When it comes to selecting a bleaching agent, it’s crucial to choose a product that is safe for both you and the environment. Consider the following options:
- Hydrogen peroxide: This is a popular and readily available choice for bleaching deer skulls. It is effective in removing stains and whitening the skull. Be sure to use a hydrogen peroxide solution with a concentration of 3% to avoid causing any damage to the bone.
- Chlorine bleach: While chlorine bleach can be used for bleaching, it is a strong chemical and should be handled with caution. This option is best suited for heavily stained skulls.
- Oxy clean or washing soda: These household items can also be used as natural bleaching agents. Mix them with warm water to create a solution and soak the skull overnight.
Applying The Bleaching Agent
Once you have chosen the right bleaching agent, follow these steps to apply it to the deer skull:
- Wear protective gloves and eye goggles to ensure your safety when working with chemicals.
- Thoroughly clean the skull to remove any flesh, dirt, or debris.
- Submerge the skull in the bleaching solution, making sure it is fully covered. You can use a plastic container or a bucket for this purpose.
- Leave the skull to soak in the solution for 24 to 48 hours or according to the product’s instructions. This allows the bleaching agent to penetrate and whiten the bone.
- Periodically check the skull’s progress and agitate the solution gently to ensure even bleaching.
- Once the desired level of whiteness is achieved, remove the skull from the bleaching solution.
Removing Residual Stains
After bleaching, it’s common to encounter residual stains that require additional attention. Here’s how to effectively remove them:
- Scrubbing with toothpaste: Use toothpaste and a toothbrush to gently scrub any remaining stains. The mild abrasive properties of toothpaste help remove stains without damaging the bone.
- Combining hydrogen peroxide and baking soda: Make a paste by mixing hydrogen peroxide and baking soda. Apply this paste to the stained areas using a toothbrush or sponge. Leave it on for a few hours before rinsing.
- Whitening creams: You can also use specific whitening creams designed for bones and skulls to target stubborn stains. Apply the cream as directed and let it sit for the recommended amount of time. Wipe it off and rinse thoroughly.
Remember to thoroughly rinse the skull after removing any stains and allow it to dry completely before displaying or storing it.
Whitening And Finishing The Skull
Learn how to effectively clean a deer skull by whitening and finishing it. Discover step-by-step techniques for achieving great results.

Whitening The Skull:
- To whiten the deer skull, you will need a mix of hydrogen peroxide and water. Here’s how you can do it:
- Create a mixture of 1-part hydrogen peroxide and 1-part water in a large container or bucket.
- Submerge the skull into the peroxide-water mixture, ensuring that it is fully covered.
- Let the skull soak in the mixture for about 24-48 hours, depending on the desired whiteness.
- Check the progress periodically and adjust the soaking time accordingly.
- Once the desired whiteness is achieved, carefully remove the skull from the mixture.
- Rinse the skull thoroughly with clean water to remove any remaining peroxide solution.
Sealing And Protecting The Skull:
- After whitening the skull, it is important to seal and protect it to maintain its appearance and durability. Follow these steps:
- Allow the skull to dry completely after rinsing.
- Apply a clear acrylic sealer or a suitable varnish to the skull’s surface.
- Use a soft brush or spray the sealer evenly, covering all areas of the skull, including the antlers or horn bases.
- Allow the sealer to dry according to the product instructions.
- Repeat the sealing process if necessary to achieve the desired level of protection.
- If you prefer a glossy finish, you can use a high-gloss varnish specifically designed for skulls.
- Ensure the skull is completely dry and free of any moisture before proceeding to the next step.
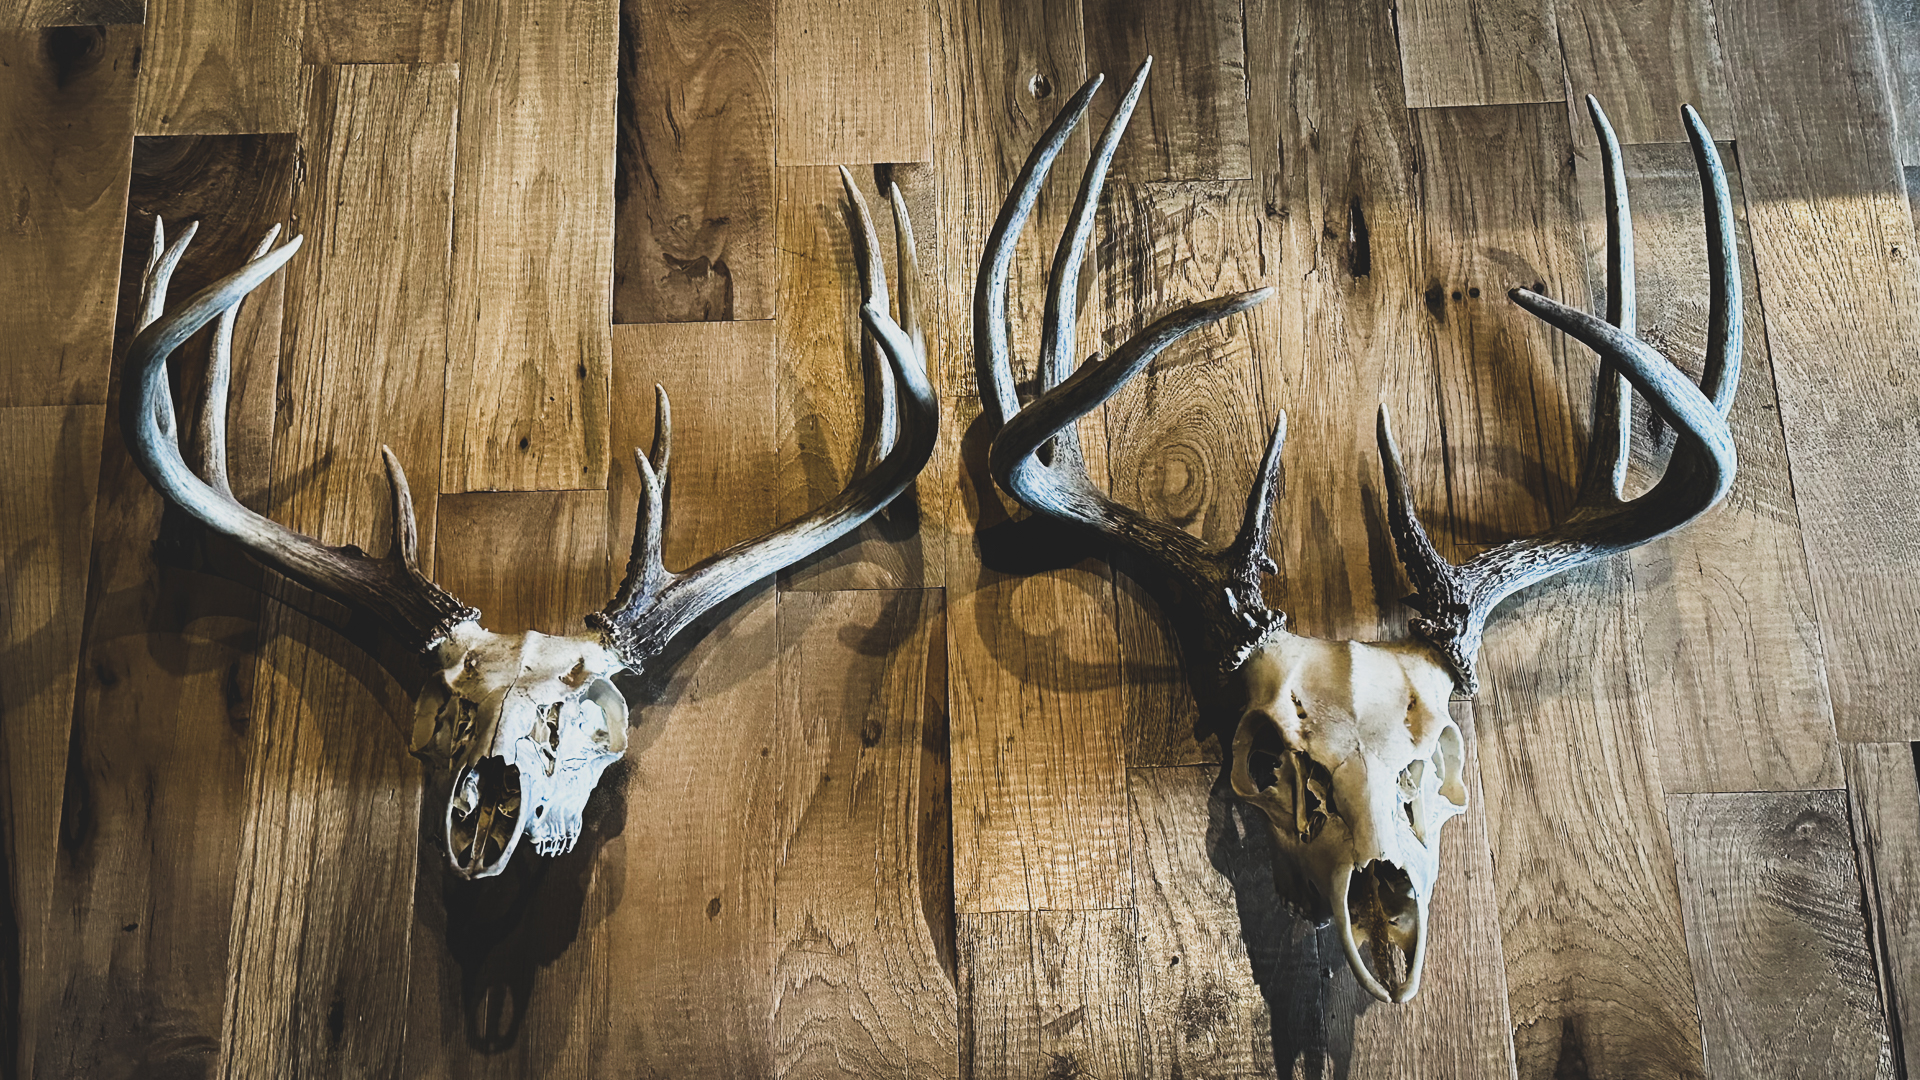
Mounting Or Displaying The Skull:
- Once the deer skull is whitened and protected, you can choose to mount or display it. Here are some options:
- Wall mounting:
- You can mount the skull on a plaque or wooden panel for wall display.
- Secure the skull to the plaque using screws or strong adhesive.
- Choose a location where the skull will be well visible and complements your space.
- Tabletop or shelf display:
- Place the skull on a sturdy, level surface such as a shelf or table.
- Use decorative accessories like artificial foliage or rocks to enhance the display.
- Make sure the skull is positioned securely to prevent accidental falls or damage.
- Antler chandelier or lamp:
- If the skull includes antlers, consider repurposing them into a unique chandelier or lamp.
- Consult a professional or follow a diy guide to safely convert the antlers into a functional lighting fixture.
- Decorative arrangements:
- Incorporate the skull into a larger decorative arrangement, such as a centerpiece or wreath.
- Combine it with natural elements like dried flowers, feathers, or rustic accents for a visually appealing display.
Remember, always prioritize safety when handling deer skulls, especially when using tools or chemicals. Properly dispose of any waste materials and respect local regulations regarding hunting and wildlife preservation. Now that you know how to clean a deer skull and finish it, you can proudly display your trophy or create unique decor pieces.
Tips And Tricks For Cleaning A Deer Skull
Discover effective tips and tricks to clean a deer skull easily and efficiently. Learn step-by-step methods for achieving the desired results without the use of commonly overused phrases or repetitive language. Enhance your knowledge on how to clean a deer skull with this informative and concise guide.
Using Safety Precautions
When it comes to cleaning a deer skull, it’s important to prioritize safety precautions to ensure a smooth and accident-free process. Here are some tips to keep in mind:
- Wear protective gear: Put on a pair of gloves and safety glasses to protect your hands and eyes from any potential harm.
- Choose a well-ventilated area: Cleaning a deer skull can produce unpleasant odors, so it’s best to work in a well-ventilated space to avoid inhaling any fumes.
- Work in a designated area: Set up a specific area for cleaning your deer skull, preferably outdoors or in a well-ventilated garage or workshop. This will help contain any mess and make cleanup easier.
- Use proper tools: Make sure you have the appropriate tools, such as a knife, wire brush, and peroxide solution, to safely and effectively clean the skull.
- Handle chemicals with care: If you’re using chemical solutions like hydrogen peroxide or bleach, follow the instructions carefully and work in a well-lit area to prevent accidental spills.
Troubleshooting Common Issues
Sometimes, despite our best efforts, we may encounter certain challenges when cleaning a deer skull. Here are some common issues and how to address them:
- Stubborn flesh and tissue: If you’re having trouble removing stubborn flesh or tissue from the skull, try soaking it in warm water or using a degreasing agent to soften the tissues before scraping them off.
- Lingering odor: If your cleaned skull still has an unpleasant odor, you can soak it in a mixture of water and baking soda for a few hours to help neutralize any lingering smells.
- Staining or discoloration: If the skull has become stained or discolored during the cleaning process, you can try using a whitening solution specifically designed for bone cleaning. Apply the solution according to the instructions, making sure to wear protective gloves.
- Damaged or fragile bones: If you notice any cracks or fragile areas on the skull, handle it with extra care to avoid further damage. You can use epoxy or another adhesive to strengthen any weak spots.
Maintenance And Care For The Cleaned Skull
Once you have successfully cleaned your deer skull, it’s important to properly maintain and care for it to ensure its longevity and visual appeal. Here are some tips for maintaining your cleaned skull:
- Dust regularly: Dust can accumulate on the skull over time, diminishing its appearance. Use a soft brush or cloth to gently remove any dust or debris.
- Display indoors: If you choose to display your cleaned skull indoors, keep it away from direct sunlight and moisture to prevent discoloration and damage.
- Avoid touching with bare hands: Oils from your skin can transfer onto the skull, potentially causing staining or deterioration. If you have to touch the skull, wear gloves to protect it.
- Store in a safe place: If you’re not displaying the skull, store it in a secure location to protect it from accidental damage. Wrap it in acid-free tissue paper or place it in a protective case to prevent dust and possible breakage.
Remember, cleaning a deer skull can be a rewarding and enjoyable experience, but it requires patience, attention to detail, and safety precautions. By following these tips and tricks, you’ll be able to clean and maintain your deer skull effectively and proudly display it for years to come.
Frequently Asked Questions On How To Clean A Deer Skull?
How Do You Clean A Deer Skull?
To clean a deer skull, remove the flesh by boiling it or using dermestid beetles.
What Tools Do I Need To Clean A Deer Skull?
To clean a deer skull, you’ll need gloves, a knife, a pot or container for boiling, peroxide, and a brush.
Can You Use Bleach To Clean A Deer Skull?
Bleach can be used to whiten a deer skull after cleaning, but it should not be used during the cleaning process.
How Long Does It Take To Clean A Deer Skull?
The time it takes to clean a deer skull depends on the method used, but it can take several hours to a few days.
How Do You Keep The Antlers Intact While Cleaning A Deer Skull?
You can keep the antlers intact by securing them with wire or zip ties before cleaning the deer skull.

Conclusion
Cleaning a deer skull may seem daunting at first, but with the right techniques and a little patience, it can be a rewarding experience. By following the step-by-step process outlined in this blog post, you can effectively remove the flesh and tissue from the skull, leaving behind a clean and pristine result.
One key takeaway from this guide is the importance of using safety precautions, such as gloves and eye protection, when working with potentially hazardous materials. Additionally, the use of common household items like peroxide and dish detergent can be effective in removing stubborn stains and odors.
Remember, practice makes perfect, so don’t be discouraged if your first attempt doesn’t yield the desired results. With time and practice, you’ll become more proficient in the art of cleaning deer skulls. Whether you plan to display your deer skull as a trophy or use it for artistic purposes, following these cleaning techniques will ensure a beautiful and long-lasting piece.
So grab your tools and get started on cleaning your deer skull today!