Last Updated on August 7, 2025
To clean an acrylic shower, mix warm water and mild dish soap, then use a soft cloth or sponge to gently scrub the surface. Rinse thoroughly with clean water.
Keeping your acrylic shower clean is important not only for hygiene but also to maintain its shiny appearance. Acrylic showers are prone to staining and can easily get dirty from soap scum, hard water deposits, and body oils. Regular cleaning prevents these build-ups and helps extend the life of your shower.
In this guide, we will show you how to effectively clean your acrylic shower using simple household ingredients. With the right technique and a little bit of effort, you can keep your acrylic shower looking fresh and spotless. Let’s get started!
Choosing The Right Cleaning Products
Looking to clean your acrylic shower? Discover the best cleaning products to effectively remove dirt and grime without damaging the surface. Keep your shower looking pristine and maintain its longevity with these recommended solutions.
Acrylic showers have become increasingly popular in modern bathrooms due to their sleek appearance and easy maintenance. However, choosing the right cleaning products is crucial to ensure that your acrylic shower stays in pristine condition. In this section, we’ll delve into the properties of acrylic showers, recommended cleaning solutions, and DIY alternatives.
The Properties Of Acrylic Showers:
- Acrylic showers are made from a lightweight and durable material that mimics the look of glass.
- They have a non-porous surface, which means that they are resistant to water and staining.
- Acrylic showers are prone to scratches, so it’s important to use non-abrasive cleaning solutions and soft cloths or sponges.
- Harsh chemicals can damage the acrylic surface and cause it to lose its shine, so it’s best to avoid them.
Recommended Cleaning Solutions For Acrylic Showers:
- Mild soapy water: Mix a gentle liquid soap with warm water and use a soft cloth or sponge to clean the shower. Rinse thoroughly afterwards.
- White vinegar solution: Create a mixture of equal parts white vinegar and water. Apply it to the acrylic surface and let it sit for a few minutes before rinsing.
- Commercial acrylic cleaners: Look for cleaners specifically designed for acrylic showers. Follow the instructions on the product carefully.
Diy Cleaning Solutions For Acrylic Showers:
- Baking soda paste: Make a paste by mixing baking soda with water. Apply it to the acrylic shower and gently scrub with a soft cloth or sponge. Rinse well.
- Lemon juice solution: Combine equal parts lemon juice and water. Apply the solution to the shower, let it sit for a few minutes, and then rinse thoroughly.
- Hydrogen peroxide solution: Mix equal parts hydrogen peroxide and water. Spray the solution onto the acrylic surface, let it sit for a while, and then rinse off.
With these cleaning solutions, you can effectively clean and maintain your acrylic shower without causing any damage. Remember to always test a small, inconspicuous area before using any new cleaning product to ensure compatibility with your shower. By choosing the right cleaning products, you can keep your acrylic shower looking pristine and ensure its longevity.
Preparing The Shower For Cleaning
To clean an acrylic shower, start by spraying a mixture of warm water and mild soap onto the surface. Scrub gently with a soft sponge or cloth, paying attention to any stains or soap scum. Rinse thoroughly with warm water and dry with a clean towel.
Removing Shower Curtains And Accessories:
- Start the cleaning process by removing any shower curtains and accessories, such as soap dispensers, shampoo bottles, and loofahs.
- Take down the shower curtains and wash them separately according to their care instructions.
- Clean or replace any accessories that have mold or mildew buildup.
Flushing The Shower With Warm Water:
- Begin by turning on the shower and letting warm water run for a few minutes.
- Make sure the water reaches all areas of the shower, including the walls, floor, and glass doors.
- Flushing the shower with warm water will help remove dirt, soap scum, and other debris.
Performing A Visual Inspection For Stains Or Mold:
- Look closely at the shower walls, floor, and corners for any visible stains or signs of mold.
- Use a flashlight if needed to check darker areas.
- If there are stains or mold present, take note of their location for targeted cleaning later on.
Remember, preparing the shower for cleaning is an essential first step to ensure effective and efficient cleaning. By removing shower curtains and accessories, flushing the shower with warm water, and performing a visual inspection, you’ll be ready to tackle the cleaning process with ease.
Cleaning The Acrylic Shower Surface
To clean an acrylic shower surface, mix equal parts water and white vinegar in a spray bottle. Spray the solution onto the surface and let it sit for a few minutes, then scrub with a soft cloth or sponge. Rinse thoroughly and wipe dry for a sparkling clean shower.
To ensure a sparkling clean acrylic shower, it’s important to pay attention to the cleaning process. Follow these steps to effectively clean the surface of your acrylic shower:
Applying The Cleaning Solution
- Select a non-abrasive cleaner specifically designed for acrylic surfaces. Avoid using harsh chemicals or abrasive scrubbers as they can damage the acrylic.
- Dilute the cleaner according to the instructions on the packaging or create a mixture of warm water and mild liquid soap.
- Spray the cleaning solution onto the shower surface, covering all areas evenly.
- Allow the solution to sit for a few minutes to loosen any dirt or grime.
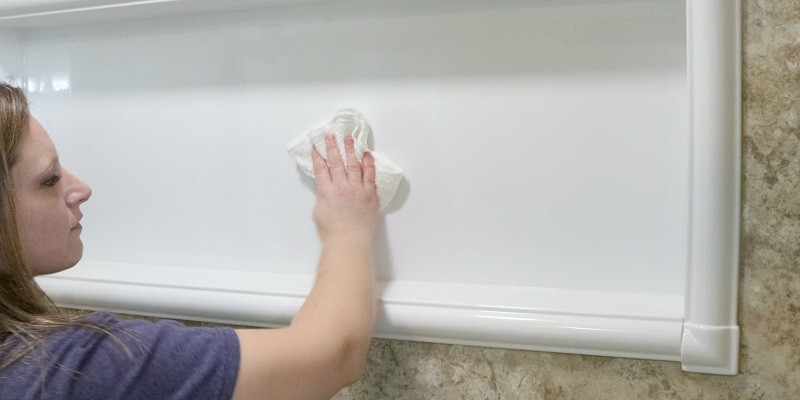
Scrubbing The Shower Walls And Base
- Use a soft cloth or sponge to gently scrub the shower walls and base in circular motions.
- Focus on areas that are visibly dirty or stained, applying slightly more pressure but avoiding excessive force.
- Rinse the cloth or sponge frequently to remove dirt and prevent it from spreading across the surface.
- Continue scrubbing until the entire shower surface is clean and free from residue.
Paying Attention To Hard-To-Reach Areas
- Pay special attention to the corners, edges, and other hard-to-reach areas of the acrylic shower.
- Utilize a soft-bristled toothbrush or a small cleaning brush to reach and clean these areas effectively.
- Apply the cleaning solution directly to the brush and gently scrub the difficult-to-reach spots.
- Take extra care to remove any soap scum or buildup in these areas.
Remember, regular cleaning and maintenance can help prevent the accumulation of dirt, grime, and soap scum on your acrylic shower surface. By following these steps, you can keep your shower looking pristine and extend its lifespan.
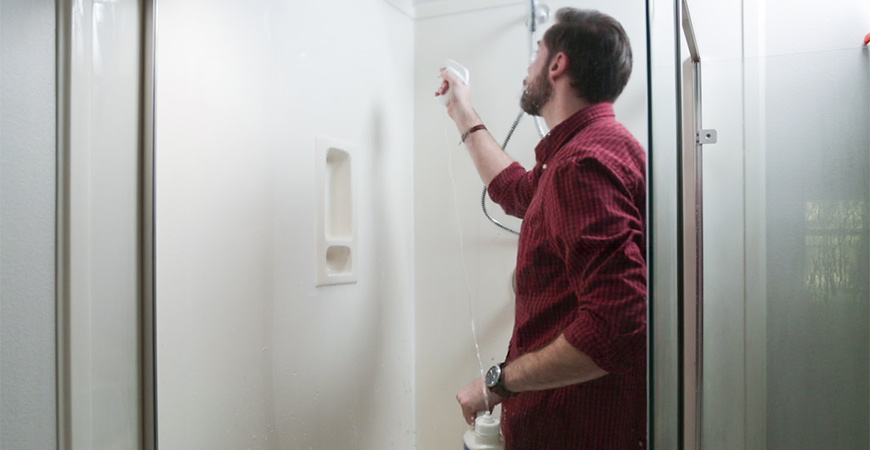
Credit: www.wetandforget.com
Rinse And Dry For A Sparkling Clean
Achieve a sparkling clean acrylic shower by following these simple steps: Rinse the shower thoroughly to remove any soap residue, dirt, and grime. Then, dry the shower with a soft cloth or towel to prevent water spots and keep it looking pristine.
Thoroughly Rinsing The Shower Surfaces
To achieve a sparkling clean acrylic shower, it’s important to thoroughly rinse all the surfaces. This step helps remove any dirt, soap scum, or cleaning products that may have accumulated. Here are some tips to ensure you’re rinsing your acrylic shower effectively:
- Start by using a handheld showerhead or a bucket of clean water.
- Begin at the top and work your way down, rinsing each wall and surface as you go.
- Pay extra attention to areas where soap and shampoo are commonly used, such as the walls around the showerhead and the floor.
- Ensure that all cleaning products and residue are completely washed away.
- Use a soft cloth or sponge to help with the rinsing process, if necessary.
- Inspect the shower surfaces after rinsing to make sure no traces of dirt or cleaning products are left behind.
Drying The Acrylic Shower To Prevent Water Spots
After thorough rinsing, drying the acrylic shower properly is essential to prevent water spots and maintain its sparkling cleanliness. Here are some useful tips to help you dry your acrylic shower effectively:
- Start by using a clean, soft cloth or towel.
- Begin at the top and work your way down, drying each surface thoroughly.
- Pay extra attention to areas prone to water spots, such as the walls around the showerhead and the shower door.
- Use gentle, circular motions to remove any remaining moisture.
- If water spots have already formed, you can use a mild non-abrasive cleaner to remove them before drying.
- Ensure that all surfaces, including the walls, floor, and fixtures, are completely dry.
Preventive Care Tips to Maintain a Clean Acrylic Shower:
- Wipe down the shower surfaces after each use, using a squeegee or a soft cloth. This helps remove any water droplets and prevents them from drying into water spots.
- Avoid using abrasive or harsh cleaning products, as they can damage the acrylic surface. Instead, opt for mild, non-abrasive cleaners specifically designed for acrylic showers.
- Regularly clean the shower drain and remove any hair or debris that might accumulate. This prevents clogging and ensures optimal drainage.
- Avoid using sharp or abrasive objects when cleaning the acrylic shower, as they can cause scratches or damage the surface.
- Consider using a protective wax or polish designed for acrylic showers. This can help repel water, reduce the build-up of soap scum, and maintain the shine of your shower.
- Keep the bathroom well-ventilated to prevent the growth of mold and mildew. Open windows or use an exhaust fan to ensure proper air circulation.
- In case of stubborn stains or build-up, consult the manufacturer’s instructions or seek professional advice.
By following these rinsing, drying, and preventive care tips, you can easily maintain a clean and sparkling acrylic shower. Remember to incorporate these practices into your regular cleaning routine to keep your shower looking its best.
Frequently Asked Questions On How To Clean Acrylic Shower?
What Is The Best Thing To Clean Acrylic Showers With?
The best thing to clean acrylic showers is a mixture of warm water and mild dish soap.
Can I Use Magic Eraser On Acrylic Shower?
Yes, you can use a magic eraser on an acrylic shower. Magic erasers are effective at removing stains and scuffs from various surfaces, including acrylic showers. They work by using micro-abrasion to gently lift dirt and grime without damaging the surface.
To use a magic eraser on your acrylic shower, wet the eraser and squeeze out any excess water. Then, gently rub the eraser on the stained or scuffed area in a circular motion. Rinse the area with clean water and wipe dry with a soft cloth.
It is important to note that while magic erasers are generally safe to use on acrylic surfaces, you should always test a small, inconspicuous area first to ensure it does not cause any damage or discoloration.
Will Bleach Harm Acrylic Shower?
Bleach can harm an acrylic shower, as it is a strong chemical that can cause discoloration, dullness, and even damage the surface. To keep your acrylic shower in good condition, it is best to avoid using bleach or any harsh chemicals.
Instead, opt for mild, non-abrasive cleaners specifically designed for acrylic surfaces. These cleaners are gentle yet effective in removing dirt, soap scum, and stains without causing harm. Regular cleaning and maintenance are key to preserving the appearance and longevity of your acrylic shower.
Remember to always read and follow the manufacturer’s recommendations for cleaning and care.
Can I Use Scrubbing Bubbles On Acrylic Shower?
Yes, you can use Scrubbing Bubbles on an acrylic shower. Scrubbing Bubbles is safe for use on acrylic surfaces.
Conclusion
Keeping your acrylic shower clean is essential for maintaining its beauty and longevity. By following these simple steps, you can effectively clean your acrylic shower. Start by removing any loose debris or dirt from the surface using a soft cloth or sponge.
Then, prepare a mixture of warm water and mild soap, and gently scrub the shower using a non-abrasive sponge or brush. Rinse thoroughly to ensure all soap residue is removed. To prevent water spots and streaks, dry the surface with a clean, soft cloth.
Avoid using harsh chemicals or abrasive materials, as they can damage the acrylic. Regular cleaning and maintenance will not only keep your shower looking sparkling clean but also extend its lifespan. Remember to prioritize gentle cleaning methods and avoid anything that might scratch or harm the acrylic.