Last Updated on August 7, 2025
To clean an airless paint sprayer, follow these steps: first, remove the spray tip and filter, then flush the system with water or a cleaning solution until the liquid runs clear. Finally, clean the remaining components with a brush and wipe down the sprayer with a damp cloth.
When using an airless paint sprayer, proper cleaning is essential to maintain its functionality and prolong its lifespan. Failure to clean the sprayer adequately can result in clogs, uneven spray patterns, and reduced performance. By following the steps outlined above, you can ensure that your airless paint sprayer remains in optimal condition and ready for use on your next painting project.
Importance Of Regular Cleaning
Regular cleaning of your airless paint sprayer is crucial to maintain its performance and longevity. Learn how to effectively clean your sprayer to ensure optimal results and avoid clogging or malfunctioning issues.
Regular cleaning of your airless paint sprayer is essential for maintaining its performance and ensuring optimal paint application. By following a cleaning routine, you can prevent various issues such as clogging and paint buildup, resulting in smooth and consistent painting results.
Let’s take a closer look at the reasons why regular cleaning is crucial:
Prevents Clogging And Paint Buildup:
- To prevent clogging, it is important to clean your airless paint sprayer after each use.
- Clogs can occur when paint residue and particles accumulate in the sprayer’s components.
- Cleaning the sprayer thoroughly helps remove any dried paint or debris that can obstruct the sprayer’s flow.
- Regular cleaning prevents blockages in the nozzle or tips, allowing the paint to flow smoothly during application.
- When the paint sprayer is clog-free, you can achieve a more even and consistent spray pattern without any interruptions.
Ensures Smooth And Consistent Paint Application:
- Cleaning your airless paint sprayer regularly ensures that there are no leftover paint remnants from previous projects.
- Residual paint can contaminate the fresh paint, leading to inconsistencies in color and texture.
- Proper cleaning eliminates any dried or hardened paint, promoting a smooth and uninterrupted paint flow throughout the spraying process.
- Regular maintenance also prevents paint buildup on the sprayer’s internal components, such as the pump and filters.
- When these parts are free from paint residue, the sprayer can maintain a consistent pressure, resulting in an even application of paint.
The importance of regular cleaning for your airless paint sprayer cannot be underestimated. Taking the time to clean your sprayer after each use not only prevents clogging and paint buildup but also ensures a smooth and consistent paint application. By incorporating regular cleaning into your painting routine, you can maintain the performance and longevity of your airless paint sprayer while achieving professional-looking results.
Step-By-Step Cleaning Process
Learn how to effectively clean your airless paint sprayer with this step-by-step process. From disassembly to thorough cleaning, this guide will help you maintain the performance and longevity of your sprayer.
Cleaning an airless paint sprayer is an essential task to maintain its performance and longevity. Follow these step-by-step instructions to ensure a thorough cleaning process:
Gather Necessary Cleaning Tools
- Clean water
- Appropriate cleaning solution
- Brush or soft cloth
- Safety gloves and goggles
Disconnect And Prepare The Sprayer For Cleaning
- Turn off and unplug the sprayer
- Relieve pressure by activating the pressure relief valve
- Remove any remaining paint from the container
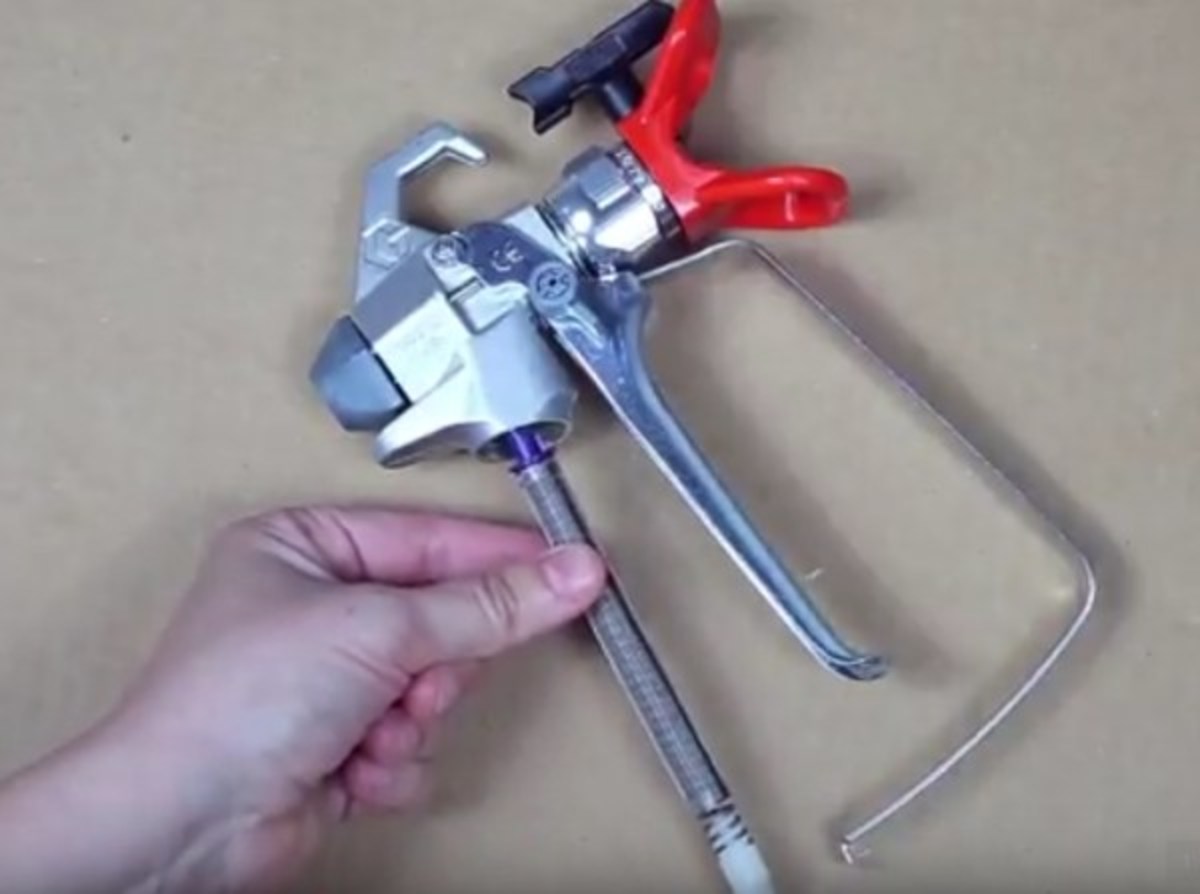
Remove Spray Tip And Filter
- Unscrew the spray tip from the gun
- Detach the filter from the gun or pump
Clean The Spray Tip And Filter
- Soak the spray tip and filter in an appropriate cleaning solution
- Use a brush to remove any paint residue or debris
- Rinse thoroughly with clean water
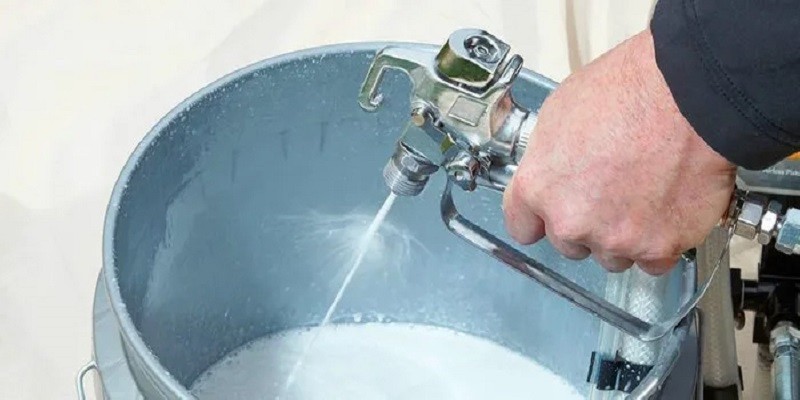
Flush The Sprayer System
- Fill the paint container with the cleaning solution
- Connect the sprayer to a water source
- Run the cleaning solution through the sprayer until it runs clear
- Empty the paint container and repeat the flushing process with clean water
Clean The Pump And Hoses
- Remove and disassemble the pump according to the manufacturer’s instructions
- Clean each component with a brush and cleaning solution, removing any paint build-up
- Rinse all components thoroughly with clean water
- Flush the hoses with clean water to remove any remaining paint or cleaning solution
Reassemble And Test The Sprayer
- Put all the components back together following the manufacturer’s instructions
- Run clean water through the sprayer to ensure proper functioning
- Check for any leaks or issues during the testing phase
Properly Store The Sprayer After Cleaning
- Ensure the sprayer is completely dry before storage
- Store in a clean and dry location, following the manufacturer’s recommendations
By following this step-by-step cleaning process, you can effectively maintain your airless paint sprayer and ensure optimal painting results for your next project. Remember to always prioritize safety by wearing appropriate protective gear and referring to the manufacturer’s instructions.
Maintenance Tips For Extended Sprayer Lifespan
To prolong the lifespan of your airless paint sprayer, it’s important to clean it regularly. Follow these maintenance tips to keep it in optimal condition and prevent any clogs or malfunctions.
Using an airless paint sprayer can make your painting projects quick and efficient. However, to ensure that your sprayer continues to work effectively and has a long lifespan, it’s imperative to take proper care of it. Here are some maintenance tips to help you keep your airless paint sprayer in excellent condition:
Use Compatible Paint And Cleaning Solutions:
- Choose paint and cleaning solutions that are compatible with your airless paint sprayer. Using the wrong type of paint can clog the sprayer and affect its performance.
- Always read the manufacturer’s instructions and recommendations for the specific paint sprayer model you own.
- Use paints and cleaning solutions that are explicitly formulated for use with airless paint sprayers.
Avoid Letting Paint Dry In The Sprayer:
- After each painting session, clean the airless paint sprayer thoroughly to prevent paint from drying inside the system.
- If you notice any clogs or blockages during use, immediately stop painting and clear them before continuing.
- Flush out the entire system with the appropriate cleaning solution to ensure that no paint residue is left behind.
Regularly Inspect And Replace Worn-Out Parts:
- Inspect your airless paint sprayer regularly for any signs of wear and tear. Check the hoses, gaskets, filters, and other parts to ensure they are in good condition.
- Replace any worn-out or damaged parts promptly to prevent leaks or reduced performance.
- Follow the manufacturer’s guidelines for replacing parts and seek professional assistance if needed.
Store The Sprayer In A Clean And Dry Area:
- After each use, clean the sprayer thoroughly as per the manufacturer’s instructions, removing any residual paint or cleaning solution.
- Store the airless paint sprayer in a clean and dry area to prevent dust, debris, and moisture from causing damage.
- Protect the sprayer from extreme temperatures and direct sunlight, as these can affect its performance and longevity.
Remember, proper maintenance of your airless paint sprayer is crucial for its extended lifespan and consistent performance. By following these tips, you can ensure that your sprayer remains in top shape and ready for your next painting project.
Troubleshooting Common Cleaning Issues
Learn how to effectively clean an airless paint sprayer with our troubleshooting guide. Discover tips and tricks for resolving common cleaning issues, ensuring your sprayer stays in optimal condition for your painting projects.
Clogging in the spray tip:
Sometimes, while using an airless paint sprayer, you may encounter clogging issues. This can be frustrating, but fear not! Here are some causes and solutions to help you troubleshoot this problem:
- Incorrect paint viscosity: If the paint is too thick, it can clog the spray tip. Thin the paint according to the manufacturer’s recommendations before using it in the sprayer.
- Debris in the paint: Check for any foreign particles in the paint that may be causing clogging. Strain the paint before pouring it into the sprayer to remove any impurities.
- Worn-out spray tip: Over time, the spray tip can wear out and become prone to clogging. Replace the worn-out tip with a new one to ensure smooth operation.
Leakage or pressure problems:
Another common issue that may arise when cleaning an airless paint sprayer is leakage or pressure problems. This can be quite frustrating, but don’t worry! Here are some causes and solutions to help you resolve this problem:
- Loose connections: Check all the connections, including the spray tip, fluid hose, and gun, to ensure they are tightened properly. Loose connections can lead to leakage and pressure loss.
- Worn-out seals or gaskets: Inspect the seals and gaskets in your sprayer for any signs of wear or damage. Replace them if necessary to prevent leakage and maintain proper pressure.
- Clogged filters: Dirty or clogged filters can cause pressure problems and even lead to leakage. Clean or replace the filters regularly according to the manufacturer’s instructions.
Ineffective cleaning:
If you find that your airless paint sprayer is not cleaning effectively, here are some causes and solutions to help you troubleshoot the issue:
- Inadequate flushing: Properly flush out the remaining paint from the sprayer after each use. Failure to do so can result in dried paint clogging the system and affecting performance. Follow the manufacturer’s instructions for flushing the sprayer correctly.
- Insufficient cleaning agents: Ensure that you are using the recommended cleaning agents or solvents to clean the sprayer effectively. Using improper cleaning solutions may not remove all the paint residue, leading to ineffective cleaning.
- Neglecting smaller components: Pay attention to cleaning not only the major components of the sprayer but also the smaller parts, such as the filters, nozzles, and gun. These components can accumulate paint residue and affect the sprayer’s performance if not cleaned thoroughly.
Remember, proper maintenance and regular cleaning of your airless paint sprayer can significantly extend its lifespan and ensure optimal performance. By troubleshooting these common cleaning issues, you’ll be able to keep your sprayer in top-notch condition for all your painting projects.
Credit: dengarden.com
Frequently Asked Questions Of How To Clean An Airless Paint Sprayer?
What Is The Best Way To Clean An Airless Paint Sprayer?
To clean your airless paint sprayer effectively, follow these steps: 1. Start by emptying any remaining paint from the sprayer into a paint container or stored properly. 2. Remove the spray tip and any filters, and clean them separately using warm soapy water or specialized cleaning solution.
3. Flush the paint sprayer with clean water by connecting a garden hose to the sprayer’s water inlet and running water through until it comes out clean. 4. Use a soft brush or cloth to scrub any remaining paint residue inside the sprayer, focusing on the pump, hose, and other parts.
5. Rinse all the parts thoroughly with clean water to remove any soap or cleaning solution residue. 6. Reassemble the sprayer, making sure all parts are properly aligned and secured. 7. Run clean water through the sprayer to ensure it is clear of any paint or cleaning solution before storing or using it again.
Regular cleaning of your airless paint sprayer will keep it in optimal condition and ensure smooth, even paint application.
How Do You Clean A Graco Airless Spray Gun?
To clean a Graco airless spray gun, follow these simple steps. Firstly, detach the spray tip and guard from the gun. Next, remove the gun’s filter and place it in a container filled with warm, soapy water. Use a brush to gently scrub the filter until it is clean.
Rinse it thoroughly and set it aside to dry. After that, remove the gun’s hose and flush it with clean water to remove any leftover paint. Finally, reassemble the spray gun, ensuring all parts are securely in place. It’s important to clean your Graco airless spray gun regularly to maintain its performance and longevity.
By following these steps, you’ll keep your spray gun in top condition, ready for your next project.
What Can I Use To Clean Paint Sprayer?
Clean your paint sprayer using a suitable cleaning solution and water. Disconnect the sprayer from the power source. Remove the nozzle and any filters or attachments. Rinse them with warm water to remove any excess paint. Fill a bucket with warm soapy water and immerse the nozzle and attachments for a few minutes.
Use a brush or sponge to scrub off any remaining paint. Rinse everything thoroughly with clean water. If there is stubborn paint residue, you can use a paint thinner or solvent recommended by the manufacturer. Wipe down the sprayer body with a cloth dampened with the cleaning solution.
Be sure to clean all parts thoroughly to prevent clogs and extend the life of your paint sprayer.
How Do You Unclog A Graco Airless Sprayer?
To unclog a Graco airless sprayer, follow these steps: 1. Turn off the sprayer and relieve the pressure by triggering the gun into a waste container. 2. Detach the spray tip and clean it using a clean, pointed tool like a toothpick or needle.
3. Check the filter screen located near the inlet valve for any debris. Clear it if necessary. 4. Pour water or a suitable cleaning solution into a bucket and connect it to the sprayer. 5. Turn on the sprayer and flush the system by triggering the gun until the liquid runs clear.
6. If the clog persists, remove the intake tube assembly and soak it in the cleaning solution to dissolve any paint build-up. 7. Reassemble the sprayer and test it by spraying water onto a test surface. Regular cleaning and maintenance will help prevent clogs in the future.
Conclusion
To keep your airless paint sprayer running smoothly and ensure optimal performance, regular cleaning is essential. By following the steps outlined in this blog post, you can effectively clean your airless paint sprayer and extend its lifespan. Remember to start by releasing any remaining pressure and removing the spray tip for thorough cleaning.
Use a cleaning solution of your choice to remove any paint residue from the sprayer components, taking care to clean the filters and ensure they are fully dry before reassembling. Regular maintenance is also important, such as checking for any signs of wear or damage and keeping your sprayer stored in a clean and dry place.
By incorporating these cleaning and maintenance practices into your routine, you can ensure that your airless paint sprayer continues to deliver professional and flawless painting results for years to come.