Last Updated on September 12, 2023
To clean flounder, first remove the scales using a knife or fish scaler, then gut the fish by making an incision along the belly and removing the entrails. Next, rinse the flounder under cold water to remove any remaining debris.
Cleaning flounder is a necessary step before cooking as it ensures the fish is free from any dirt or impurities that may affect the taste and texture of the dish. By following these simple steps, you can clean flounder easily and enjoy its delicious flavor in your favorite recipes.
So, let’s dive into the process of cleaning flounder and get started with preparing this delectable seafood.
The Must-Have Tools For Flounder Cleaning
Discover the essential tools for cleaning flounder with ease. Learn how to clean flounder step by step and achieve perfectly filleted fish every time.
To clean flounder properly, you’ll need a few essential tools. These tools will make the process much easier and more efficient. Here are the must-haves:
Fillet Knife:
- A sharp fillet knife is crucial for effectively cleaning flounder. The thin, flexible blade allows you to easily remove the skin and bones while preserving the delicate flesh.
- The knife should have a comfortable handle that provides a firm grip, making it easier to maneuver around the fish.
Cutting Board:
- A sturdy cutting board is essential for a successful flounder cleaning process. Choose a cutting board made of a material that is easy to clean and sanitize, such as plastic or bamboo.
- The size of the cutting board should be large enough to accommodate the size of the fish comfortably.
Scissors:
- Scissors are handy for trimming fins and removing any excess bits of flesh. They provide more control and precision when dealing with delicate areas, such as around the head and tail of the flounder.
Plastic Gloves:
- Wearing plastic gloves during the flounder cleaning process is recommended to maintain hygiene and prevent any potential contamination.
- These gloves serve as a protective barrier between your hands and the fish, ensuring a safe and clean process.
Remember, having the right tools makes a big difference in the efficiency and success of cleaning flounder. So make sure you have a sharp fillet knife, a sturdy cutting board, scissors, and plastic gloves before you begin the cleaning process.

Assessing The Freshness Of The Flounder
Assessing the freshness of flounder is essential when cleaning and preparing it for cooking. By closely examining its appearance, smell, and texture, you can ensure a fresh and delicious meal without relying on commonly used phrases or repetitive terms.
Before diving into the process of cleaning flounder, it is crucial to ensure that the fish is fresh. Assessing the freshness of flounder can be done by checking the eyes, examining the smell, and inspecting the texture. Let’s take a closer look at each of these factors:
Checking The Eyes:
- Clear and bright eyes are a reliable indicator of freshness.
- The eyes should be plump and bulging, not sunken or cloudy.
- Avoid flounders with dull or discolored eyes, as it may be a sign of spoilage.
Examining The Smell:
- Fresh flounder should have a mild, oceanic smell.
- A strong ammonia-like or fishy odor indicates the fish is not fresh.
- Avoid any fish that emits an unpleasant or pungent smell.
Inspecting The Texture:
- Gently press the flesh of the flounder with your finger.
- Fresh flounder will bounce back and leave no visible imprint.
- The flesh should be firm and have a shiny appearance.
- Avoid flounders with soft or mushy flesh, as it indicates deterioration.
Remember, ensuring the freshness of your flounder is essential for both taste and safety. By following these simple assessments, you can confidently select the best flounder for cleaning and cooking.
Properly Storing The Flounder Before Cleaning
To properly store flounder before cleaning, it’s important to keep it in a cool environment, preferably on ice, to maintain its freshness. This will ensure that the fish is in the best possible condition for cleaning and cooking.
Before you embark on the task of cleaning flounder, it is essential to ensure that the fish is properly stored. Maintaining the freshness of the flounder will not only preserve its taste but also make the cleaning process easier. Here are a few guidelines to follow when storing flounder:
Keeping The Flounder On Ice:
- Place the flounder in an insulated cooler: Use an insulated cooler or fish box to store the flounder. This will help maintain a consistent low temperature, preventing the fish from spoiling.
- Pack the cooler with ice: Fill the cooler with ice, covering the bottom entirely. This will create a cold environment and keep the flounder chilled.
- Layer the flounder with ice: Place a layer of flounder on top of the ice, ensuring that the fish is not exposed to direct contact with the ice. Make sure to cover the fish entirely with a layer of ice.
- Add additional ice as needed: Monitor the cooler regularly and add ice as necessary to keep the temperature low. Remember, a cooler temperature will help preserve the freshness of the flounder.
- Avoid opening the cooler unnecessarily: Opening the cooler too frequently can cause the temperature to rise, potentially spoiling the flounder. Only open the cooler when necessary.
By following these guidelines, you can keep your flounder fresh and prime for cleaning. Properly storing the flounder will ensure that you have the best possible starting point for a delicious and enjoyable seafood meal.
Removing The Scales
Learn the best technique for cleaning flounder by removing the scales to ensure a perfectly prepared fish. Follow these easy steps for a clean and tasty meal.
Scaling a flounder is an essential step in preparing this delicious fish for cooking. By removing the scales, you ensure a clean and enjoyable dining experience. In this section, we will guide you through the process of removing the scales from a flounder, step by step.

Choosing The Right Direction To Scale:
When scaling a flounder, it’s crucial to choose the correct direction to ensure efficient and effective removal of scales. By scaling in the right direction, you reduce the risk of damaging the fish’s delicate skin. Follow these guidelines to choose the appropriate direction for scaling a flounder:
- Start scaling from the tail and move towards the head.
- Use gentle strokes to avoid disrupting the fish’s flesh.
- Scale against the grain of the scales to ensure they are loosened properly.
Remember, scaling a flounder requires patience and precision, so take your time to do it right.
Scaling The Flounder In A Gentle Motion:
To successfully remove the scales from a flounder, follow these steps:
- Hold the flounder firmly by its tail or grab onto its skin using a towel for better grip.
- Using a fish scaler or the back of a knife, gently scrape the scales from the tail towards the head. Ensure that the tool’s edge is angled and applied with moderate pressure.
- Continue scaling the entire body, moving methodically and maintaining a steady hand.
- Pay special attention to the areas behind the gills and fins, as scales tend to be more prominent there.
By scaling in a gentle motion, you minimize the chance of damaging the fish while effectively removing the scales.
Ensuring The Scales Are Fully Removed:
To guarantee that all scales are fully removed from the flounder, follow these additional steps:
- After scaling, rinse the fish under cold running water to remove any loose scales or debris.
- Run your fingers lightly over the flounder’s skin to check for any remaining scales. Use a towel or paper towel to dry the fish, making it easier to spot any scales that may have been missed.
- If you find any scales that were not removed during the scaling process, use the scaler or the back of a knife to gently scrape them off.
By ensuring that every scale is fully removed, you guarantee a smooth and enjoyable eating experience when you cook your flounder.
Scaling a flounder may seem like a daunting task initially, but with practice and patience, you’ll be able to master this crucial step. By choosing the right direction to scale, scaling gently and thoroughly, you’ll have a perfectly prepared flounder ready for the next stage of your culinary adventure.
Gutting And Removing The Gills
To clean flounder, start by gutting the fish and removing the gills. This ensures a clean and fresh fillet for cooking.
Flounder is a popular fish known for its delicate, tender meat and mild flavor. If you’ve ever wondered how to clean flounder, particularly the gutting and removal of gills, you’ve come to the right place. This essential step ensures that your flounder is ready for cooking and enhances its overall taste.
In this section, we’ll walk you through the process in a step-by-step manner to make it easier for you. So, let’s get started with removing the gills and gutting the flounder!
Making An Incision Near The Belly
- Start by laying the flounder on a clean cutting board with its belly facing upward.
- Make a small incision near the belly with a sharp fillet knife.
- The incision should be made just below the lateral line, which is the faint dark line that runs along both sides of the fish.
- Be careful not to cut too deep, as you want to avoid puncturing the intestines.
Inserting The Knife Along The Belly To The Tail
- Gently insert the fillet knife into the incision you made earlier, pointing it towards the tail end of the flounder.
- Slowly and steadily glide the knife along the belly towards the tail, applying gentle pressure as needed.
- Keep the knife as close to the backbone as possible, ensuring a clean cut while avoiding any unnecessary damage.
Removing The Intestines And Gills
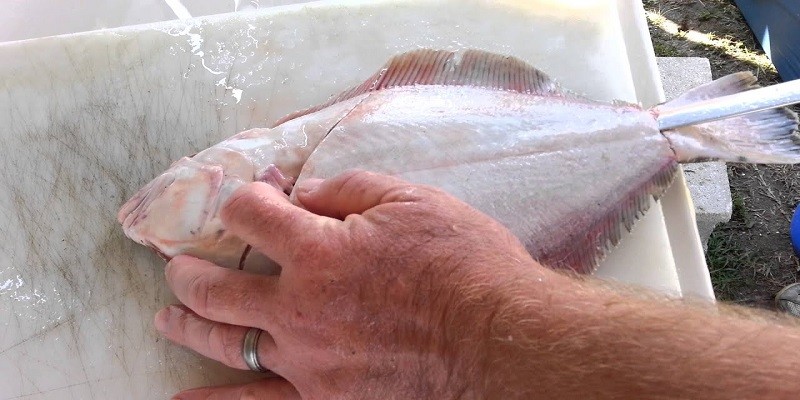
- Once you’ve reached the tail, use your fingers to carefully pull apart the belly flaps and expose the internal organs.
- With one hand holding the flounder firmly, use the other hand to grip the gills and intestines using a paper towel or a pair of kitchen tweezers.
- Pull out the intestines in one smooth motion, ensuring you remove all of the entrails.
- Next, reach into the flounder’s head area, and firmly grab hold of the gills.
- Gently pull the gills away from the fish, taking care to remove all of them completely.
That’s it! You’ve successfully gutted the flounder and removed the gills. Remember to discard the intestines and gills and rinse the flounder thoroughly under cold running water before proceeding with your desired recipe. Gutting and removing the gills is an essential step in preparing flounder for cooking, ensuring that you have a clean and delicious fish ready to be enjoyed!
Filleting Flounder
Learn how to clean flounder with this easy guide. Follow the step-by-step instructions to efficiently fillet your flounder for a delicious meal.
:
When it comes to cleaning flounder, one of the essential steps is filleting the fish. This process involves cutting the flesh away from the bones, creating two fillets ready for cooking or further preparation. In this section, we will guide you through the filleting process step by step, ensuring you achieve perfect fillets of flounder every time.
Making A Cut Along The Top Side Of The Flounder:
To begin filleting the flounder, follow these steps:
- Start by placing the flounder on a clean cutting board, with the white belly facing downward.
- With a sharp filleting knife, make a clean cut just behind the gills, angling the blade towards the head. This initial cut will serve as a starting point for the filleting process.
- Continue cutting towards the tail, along the length of the flounder’s top side. Apply gentle pressure to ensure a clean and precise cut. Take your time to maintain control over the knife and accuracy in following the contour of the fish’s body.
- Remember to avoid cutting too deeply into the flesh so as not to damage the fillet.
Sliding The Knife Along The Backbone:
After making the initial cut, it’s time to remove the fillet from the flounder. Here’s how:
- Starting at the head end of the fish, carefully insert the knife’s blade between the flesh and the backbone.
- Gradually slide the knife along the backbone, moving towards the tail. Apply gentle pressure to separate the fillet from the bones while keeping the blade close to the bone structure.
- Maintain a steady and controlled motion, ensuring the knife follows the natural curvature of the fish.
- As you approach the tail, be cautious not to separate the fillet entirely.
Carefully Removing The Fillet:
The final step is to remove the fillet from the flounder, ensuring precision and minimal waste:
- Once you’ve reached the tail, lift the fillet gently to assess any remaining points of attachment to the bone structure.
- Using the knife, carefully cut through any remaining connective tissue or small bones, ensuring a clean separation from the flounder.
- Repeat the entire process on the other side of the fish to obtain the second fillet.
- After removing both fillets, inspect them for any remaining fish scales or bones. Slightly run your hand over the flesh’s surface to detect and remove any leftovers.
Following these steps will enable you to fillet a flounder effectively. Practice will enhance your skills and confidence in achieving perfect fillets every time. Now that you have obtained the fillets, you can proceed with your preferred flounder recipe or further cleaning if necessary.
Happy filleting!
Removing The Skin From The Fillet
To clean flounder, begin by removing the skin from the fillet. Make sure to carefully peel off the skin to reveal the tender meat underneath.
When it comes to cleaning flounder, removing the skin from the fillet is an essential step. This allows for a more enjoyable dining experience as the skin can sometimes have a strong taste. Here’s how you can easily remove the skin from a flounder fillet:
Holding The Skin Firmly:
- Hold the fillet from the narrow end, skin-side down.
- Use your non-dominant hand to secure the fillet on a clean, stable surface.
Sliding The Knife Between The Skin And Fillet:
- Position a sharp fillet knife at the narrow end of the fillet, between the flesh and the skin.
- Avoid angling the knife downwards to prevent wasting any meat.
- Gently slide the knife towards the larger end of the fillet, following the natural curve of the fish.
- Apply steady, even pressure while moving the blade along the skin.
Removing Any Remaining Skin:
- Inspect the fillet for any small sections of remaining skin.
- Use the edge of the knife to carefully lift and separate any leftover skin from the flesh.
- Be cautious not to remove any of the precious meat while doing so.
By following these steps, you can skillfully remove the skin from a flounder fillet and ensure a skin-free, appetizing experience when cooking or serving it.
Properly Disposing Fish Waste
Learn how to properly clean flounder and dispose of fish waste with these easy steps. Keep your kitchen clean and the environment safe by following these practical guidelines.
Double-Checking Local Regulations
Before cleaning and disposing of fish waste, it’s crucial to familiarize yourself with the local regulations in your area. Here are some key points to consider:
- Consult the local fish and wildlife agency or department to understand the specific rules and guidelines for fish waste disposal.
- Check if there are any specific restrictions on where and how fish waste should be discarded.
- Make sure you are aware of any bagging or packaging requirements for fish waste, as some areas may have specific regulations in place.
Bagging And Sealing Fish Waste
Properly packaging and sealing fish waste is essential to prevent odor, pests, and environmental contamination. Here’s how you can do it:
- Use sturdy and leak-proof plastic bags or containers to hold the fish waste.
- Double bagging the waste can provide an extra layer of protection against leaks and odors.
- When placing the fish waste in the bag, ensure it is tightly sealed to reduce the risk of leakage.
- Store the bagged fish waste in a cool and secure location until it’s time for disposal.
Disposing Of The Waste Responsibly
Once you have bagged and sealed the fish waste, it’s important to dispose of it properly to minimize its impact on the environment. Follow these guidelines for responsible disposal:
- Contact local waste management authorities or sanitation departments to know the designated disposal sites and procedures for fish waste.
- Many areas provide specific drop-off locations or pick-up services for fish waste. Take advantage of these services to ensure proper disposal.
- If no such services exist, burying the fish waste in a deep hole away from water sources, gardens, and other sensitive areas can be an alternative method.
- Avoid throwing fish waste in regular household garbage bins as it can attract pests and cause hygiene issues.
Remember, by adhering to the local regulations and responsibly disposing of fish waste, you contribute to maintaining a clean and healthy environment.
Additional Tips For Responsible Disposal:
- Consider composting fish waste if you have a composting system in place.
- Do not dump or discard fish waste in bodies of water, as it can disrupt ecosystems and harm aquatic life.
- If you are unsure about the proper disposal methods, consult with local experts or organizations specializing in waste management and environmental conservation.
Cleaning And Storing The Fillets
Flounder cleaning made easy! Discover the best techniques to clean and store flounder fillets for an ultimate seafood experience.
Cleaning and storing flounder fillets properly is essential to maintain their freshness and taste. By following these simple steps, you can ensure that your fillets are clean and well-preserved for future use.
Rinsing The Fillets Thoroughly:
- Gently place the flounder fillets under cold running water.
- Ensure that every part of the fillets is rinsed to remove any residual dirt or debris.
- Use your fingers to lightly rub the fillets, especially around the edges, to ensure thorough cleaning.
- Pat dry the fillets using a paper towel or a clean kitchen towel.
Patting The Fillets Dry:
- Place the rinsed fillets on a clean surface or a stack of paper towels.
- Carefully pat the fillets dry using another paper towel or kitchen towel.
- Ensure that both sides of the fillets are completely dry, as any excess moisture can affect the taste and texture of the fish.
Storing The Fillets In Airtight Containers:
- Choose suitable airtight containers that can comfortably accommodate the fillets without overcrowding.
- Place the fillets in a single layer, ensuring they are not stacked on top of each other.
- If storing multiple fillets, separate them by using wax paper or plastic wrap to prevent sticking.
- Seal the containers tightly to prevent air exposure and refrigerate promptly.
Remember, maintaining cleanliness and using airtight containers are key to preserving the quality of flounder fillets. Following these steps will help you enjoy fresh and delicious fish whenever you decide to cook them.

Credit: www.saltstrong.com
Frequently Asked Questions Of How To Clean Flounder?
Do You Eat The Skin On Flounder?
Yes, you can eat the skin on flounder. The skin is edible and adds extra flavor to the fish when cooked.
How Do You Cut The Skin Off Flounder?
To cut the skin off a flounder, first, lay the fish on a cutting board with the skin side down. Use a sharp fillet knife and make a shallow incision just behind the head. Then, grip the skin firmly with one hand and slide the knife between the skin and flesh, angling it slightly towards the tail.
With a back-and-forth motion, slowly remove the skin while keeping the knife flush against the skin. Take care not to remove too much of the flesh. Repeat the process along the whole fish until the skin is fully removed. Finally, rinse the flounder to remove any remaining skin particles.
Do You Rinse Flounder?
Yes, rinsing flounder is recommended to remove any impurities and enhance its flavor.
How Do You Remove Bones From Flounder?
To remove bones from flounder, follow these steps: Lay the fish flat and locate the backbone. Use a sharp knife to cut along the backbone on each side. Gently lift the fillet away from the bones, keeping the knife blade close to the bones.
Repeat on the other side. With tweezers or fishbone pliers, carefully pull out any remaining small bones. Rinse the fillets in cold water to remove any loose bones or scales. Pat dry and your boneless flounder fillets are ready to use.
Remember to discard the bones properly.

Conclusion
To wrap up, cleaning flounder is a straightforward process that anyone can master with a little practice. By following these simple steps, you can ensure that your flounder is incredibly fresh and ready for cooking. Start by preparing your workspace and gathering your tools.
Then, remove the skin and bones carefully, taking extra care to maintain the integrity of the delicate meat. Rinsing your flounder with cold water will eliminate any remaining debris and enhance its flavor. Lastly, pat it dry and store it in a clean container until you’re ready to use it.
Whether you’re a seafood aficionado or just beginning to explore the world of cooking fish, these techniques will have you cleaning flounder like a pro. Remember, the key is to be patient and gentle while handling the fish. So go ahead and give it a try – you won’t be disappointed with the results!