Last Updated on August 7, 2025
To clean landscape rocks, remove any debris, use a hose or pressure washer to wash them thoroughly, and let them dry in the sun. Landscape rocks can gather dirt, leaves, and other debris over time, making them appear dull and dirty.
To restore their natural beauty, it is important to clean them regularly. Start by removing any visible debris or loose dirt from the rocks. Then, using a hose or pressure washer, wash the rocks thoroughly, making sure to get into all the nooks and crevices.
Finally, allow the rocks to dry in the sun before replacing them in the landscape. Regular cleaning will help maintain the aesthetic appeal of your outdoor space.
Credit: www.rynolawncare.com
Enhancing The Beauty And Functionality Of Your Outdoor Space
A Clean And Well-Maintained Landscape Adds Value To Your Property
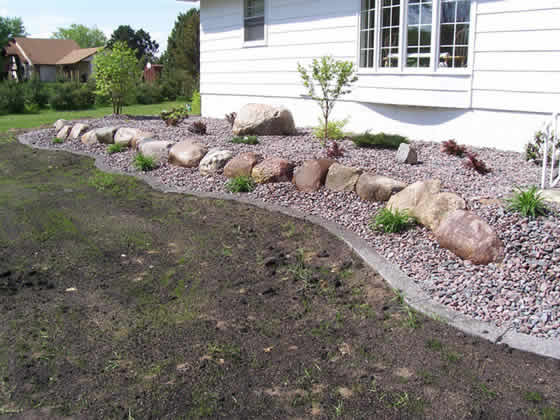
Maintaining a pristine outdoor space not only enhances the overall beauty of your property but also adds significant value to it. A well-kept landscape creates a positive first impression and attracts potential buyers or visitors. One crucial aspect of achieving a clean and inviting outdoor area is by ensuring that your landscape rocks are regularly cleaned and well-maintained.
Clean rocks not only provide a neat and organized appearance to your garden but also contribute to the overall functionality and safety of your outdoor space.
Clean Rocks Provide A Neat And Organized Appearance To Your Garden
Keeping your landscape rocks clean is essential for maintaining an aesthetically pleasing garden. Here are some key reasons why clean rocks contribute to a neat and organized outdoor space:
- Enhances visual appeal: Clean rocks have a natural shine and orderly arrangement, making your garden visually appealing and well-groomed.
- Defines landscaping elements: Landscape rocks act as a border or barrier between different landscaping elements, such as flower beds or walkways. Regular cleaning ensures that the rocks stand out and maintain the intended design and structure.
- Minimizes weed growth: When rocks are clean and debris-free, there are fewer chances for weeds to take root among them. This helps in reducing the maintenance required to keep your garden weed-free.
- Prevents stone erosion: Build-up of dirt, algae, or moss on rocks can cause them to deteriorate and erode over time. Regular cleaning helps prevent these issues, preserving the integrity and longevity of your landscape rocks.
Removing Debris And Build-Up Ensures A Safe And Comfortable Outdoor Environment
In addition to enhancing the visual appeal of your garden, cleaning your landscape rocks plays a vital role in creating a safe and comfortable outdoor environment. Here’s why removing debris and build-up is crucial:
- Prevents slips and falls: Build-up of leaves, moss, or algae on rocks can make them slippery and increase the risk of slips and falls. Regular cleaning helps remove these hazards, ensuring a safe outdoor space for you, your family, and your guests.
- Discourages pests: Debris and build-up can attract unwanted pests, such as insects or rodents, which may pose health risks or damage your garden. Regularly cleaning your landscape rocks helps discourage these pests from establishing their habitats.
- Maintains proper drainage: Accumulation of dirt or debris around rocks can hinder proper drainage, leading to water pooling and potential damage to your plants. Cleaning the rocks ensures that water can flow freely, maintaining the health and longevity of your garden.
By following proper cleaning techniques and incorporating regular maintenance, you can transform your landscape rocks into beautiful focal points that elevate the overall beauty and functionality of your outdoor space.
Preventing Weed Growth
Clearing Rocks From Weed Seeds Prevents Them From Taking Root And Spreading
Weeds can be a major headache for any gardener, quickly overtaking your beautiful landscape and stealing valuable nutrients and water from your plants. Clearing landscape rocks from weed seeds is essential in preventing these pesky intruders from taking root and spreading.
Here are some effective methods to help you eliminate weeds and maintain a weed-free garden:
- Regularly inspect your landscape rocks and remove any visible weed seeds or seedlings. By doing this, you can prevent further spread and minimize the chances of weeds taking hold.
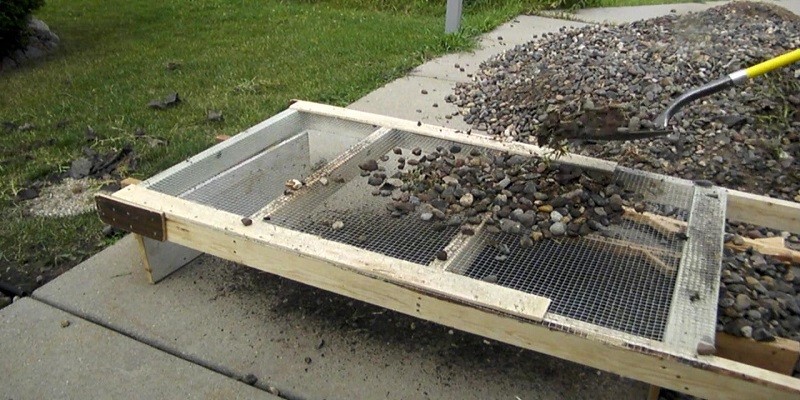
- Use a garden rake or a stiff brush to loosen and dislodge any weed seeds that may have settled in the crevices or gaps between the rocks. This will make it easier to remove them.
- Consider using a leaf blower or a high-pressure hose to blow or wash away any loose debris, including weed seeds, from the surface of your landscape rocks. This can be a quick and effective way to prevent weeds from germinating and establishing themselves.
- Apply a weed barrier fabric or geotextile under your landscape rocks. This material acts as a physical barrier, preventing weed seeds from coming into contact with the soil below. It can be especially useful in areas where weed growth is a persistent problem.
- Ensure proper spacing between your landscape rocks to minimize the accumulation of debris and encourage better airflow. This will help to prevent the growth of weeds and create a more visually appealing and low-maintenance landscape.
- Regularly maintain your garden by removing any fallen leaves, mulch, or other organic matter that may accumulate on your landscape rocks. Weed seeds can easily hitch a ride on these materials and find a cozy spot to germinate and grow.
- Consider applying a pre-emergent herbicide to your landscape rocks. These herbicides work by inhibiting the growth and development of weed seeds, effectively reducing the weed population in your garden. However, it’s important to use these products sparingly and according to the manufacturer’s instructions to avoid any potential harm to desirable plants.
- Plan your landscape design strategically to avoid areas where weed growth is common. For example, avoid placing landscape rocks in areas with poor drainage or where water tends to accumulate, as this can create a favorable environment for weed growth.
- Regularly monitor your landscape rocks for any signs of weed growth and take immediate action to remove any weeds before they have a chance to spread. This proactive approach will help to keep your garden looking pristine and weed-free.
- Consider using organic methods to control weeds, such as mulching with organic materials like wood chips or straw. This not only helps to suppress weed growth but also provides additional benefits like improving soil moisture retention and enhancing overall soil health.
By following these tips and regularly clearing your landscape rocks from weed seeds, you can effectively prevent weeds from taking root and spreading in your garden. This will ensure that your plants have the best chance to thrive by reducing competition for nutrients and water.
Keep your landscape looking neat, tidy, and weed-free with these preventative measures.
Gathering The Necessary Tools And Equipment
Maintaining a clean and well-maintained landscape can enhance the overall appearance of your outdoor space. When it comes to cleaning landscape rocks, it is essential to have the right tools and equipment at hand. Having a well-equipped arsenal will not only make the process more efficient but also ensure your safety.
Here are the tools and equipment you will need:
- Protective gloves and eyewear: Before you embark on any cleaning task, safety should be your top priority. Protect your hands with sturdy gloves and wear safety glasses or goggles to shield your eyes from debris and cleaning solutions.
- Brushes and scrubbers: To remove dirt, grime, and algae buildup from your landscape rocks, you will need various types of brushes and scrubbers. Soft-bristled brushes work well for delicate surfaces, while stiff-bristled brushes can tackle tougher stains. Nylon bristle brushes and scrubbers are also effective and won’t damage the rocks.
- Pressure washer or hose with adjustable nozzle: A pressure washer can be a powerful tool for cleaning landscape rocks, especially if there is a significant amount of dirt and grime. Adjust the nozzle to a suitable pressure level to avoid damaging the rocks. If you don’t have a pressure washer, a hose with an adjustable nozzle can also do the job.
- Wheelbarrow or large containers for debris disposal: As you clean the landscape rocks, you will likely encounter debris, such as leaves, twigs, and dirt. Having a wheelbarrow or large containers nearby will make it easier to collect and dispose of the debris properly. Ensure you have a designated area for disposal, such as a compost pile or designated trash bags.
With these essential tools and equipment, you are ready to embark on your landscape rock cleaning journey. Remember to prioritize safety, choose the right brushes and scrubbers for the job, and dispose of debris responsibly. In the next section, we will explore the step-by-step process of cleaning landscape rocks effectively.
So let’s dive in!
Ensuring Personal Safety
When it comes to cleaning landscape rocks, ensuring personal safety should be your top priority. Take the following precautions to protect yourself from any potential injuries or health hazards:
- Wearing appropriate protective clothing: Before you start working with landscape rocks, make sure to wear the right protective clothing. This includes gloves, safety goggles, and sturdy closed-toe shoes. These items will shield your hands, eyes, and feet from any sharp edges or flying debris.
- Taking necessary precautions to avoid injuries: While handling landscape rocks, be cautious and take necessary precautions to prevent injuries. Avoid lifting heavy rocks alone and ask for assistance if needed. Use proper lifting techniques, bending your knees and lifting with your legs instead of your back.
- Working in a well-ventilated area to minimize dust inhalation: Cleaning landscape rocks can create dust particles, which can be harmful if inhaled. To reduce the risk, it’s important to work in a well-ventilated area. If possible, do the cleaning outdoors or open windows and doors to allow fresh air to circulate. Consider using a dust mask to further protect your respiratory system.
Remember, your safety should never be compromised while cleaning landscape rocks. By wearing appropriate protective clothing, taking necessary precautions, and working in a well-ventilated area, you can have a safer and more enjoyable rock cleaning experience.
Step 1: Removing Large Debris And Vegetation
Clearing Away Leaves, Branches, And Other Loose Debris:
Landscape rocks are a beautiful addition to any outdoor space, but over time they can accumulate leaves, branches, and other loose debris. To keep your landscape rocks looking pristine, it’s important to start by removing all the large debris and vegetation.
Here’s how you can do it:
- Begin by using a leaf blower or a broom to clear away any leaves or small pieces of debris on the surface of the rocks. This will help create a clean starting point for the rest of the cleaning process.
- Next, inspect the rocks carefully and manually remove any larger branches or twigs that may have fallen or gotten stuck in between the rocks.
- Don’t forget to check for any other loose debris such as pinecones, acorns, or even trash that might have found its way onto your landscape rocks. Clean those up as well to ensure a thorough cleaning.
- It’s important to be gentle when removing debris to avoid damaging the rocks or scratching their surface. Take your time and be thorough to achieve the best results.
- Once you’ve cleared away the leaves, branches, and other loose debris, your landscape rocks will be ready for the next step in the cleaning process.
Step 2: Sweep Or Blow Away Loose Dirt
To effectively clean landscape rocks, the next step is to remove loose dirt and dust. This will help prepare the surface for a deeper cleaning. Here are a few methods you can use:
- Using a broom: Start by using a broom with sturdy bristles to sweep away loose dirt and debris from the rocks. Work systematically, ensuring you cover the entire area. Pay particular attention to corners and crevices where dirt tends to accumulate. Regularly shake the broom to remove any collected dirt and continue sweeping until the rocks appear free of loose debris.
- Utilizing a leaf blower: Another option is to use a leaf blower to blow away loose dirt and dust. Set the blower to a low or medium speed setting, as high speeds may blow away smaller rocks or cause damage. Point the blower nozzle towards the rocks, focusing on areas where dirt is likely to gather. Make sure to wear eye protection to shield yourself from any flying debris.
- Cleaning the corners and crevices: Dirt often finds its way into corners and crevices of landscape rocks. To ensure a thorough cleaning, use a small handheld brush or toothbrush to gently scrub these hard-to-reach areas. Be careful not to apply too much force or use abrasive brushes that could scratch the rocks.
Remember, the goal is to remove loose dirt and dust from the rocks before moving on to a more thorough cleaning process. By utilizing a broom or leaf blower and paying attention to corners and crevices, you’ll be well on your way to achieving sparkling landscape rocks.
Step 3: Scrubbing And Cleaning The Rocks
To ensure your landscape rocks are looking pristine, it’s important to scrub and clean them properly. Follow these steps to get the job done effectively:
Mixing A Solution Of Mild Detergent And Water In A Bucket:
- Fill a bucket with water, ensuring it’s enough to cover the rocks you’ll be cleaning.
- Add a small amount of mild detergent to the water.
- Mix the solution thoroughly until the detergent is fully dissolved.
Using A Brush Or Scrubber To Gently Scrub The Rocks, One Section At A Time:
- Dip the brush or scrubber into the detergent solution.
- Begin scrubbing one section of the rocks, moving in a circular motion.
- Ensure you’re applying gentle pressure to avoid damaging the rocks.
- Pay close attention to any stubborn stains or dirt buildup, giving them extra care.
- Continue scrubbing until the section is clean and free from dirt and grime.
- Repeat this process on the remaining sections of the rocks until all are cleaned.
Remember to rinse the rocks with water after scrubbing to remove any remaining traces of detergent. This will help maintain the natural beauty of your landscape rocks.
By following these simple steps, you can effortlessly clean your landscape rocks and keep them looking their best.
Step 4: Rinsing And Drying The Rocks
After applying detergent and scrubbing the landscape rocks, it’s time to rinse off the remaining dirt and grime. Here’s how you can effectively clean and dry the rocks to restore their natural beauty:
Using A Pressure Washer Or Hose To Rinse Off The Detergent And Dirt:
- Start by attaching a pressure washer or hose to a water source.
- Gently spray the rocks, focusing on spraying away the detergent and dirt.
- Move in a sweeping motion, ensuring all areas of the rocks are thoroughly rinsed.
- Adjust the pressure as needed, avoiding high pressure that might damage the rocks.
- Continue rinsing until the water runs clear, indicating that all the detergent and dirt has been removed.
Allowing The Rocks To Air Dry Or Using A Towel To Speed Up The Drying Process:
- If you have sufficient time, allow the rocks to air dry naturally. Simply spread them out in a well-ventilated area and let them dry under the sun.
- To speed up the drying process, use a clean towel or cloth to gently pat the rocks dry. Ensure the rocks are completely dry before returning them to their designated area.
Remember, proper rinsing and drying are crucial to prevent any residue or moisture from trapping on the rocks’ surface. By following these steps, your landscape rocks will be clean and ready to enhance the beauty of your outdoor space.
Regular Maintenance Tips
Regular Maintenance Tips:
Maintaining your landscape rocks on a regular basis will keep them looking clean and beautiful year-round. By following these simple tips, you can ensure that your rocks remain in top condition:
- Clearing debris regularly to prevent build-up: Regularly remove fallen leaves, twigs, and any other debris from your landscape rocks. Sweep or use a leaf blower to keep them free from organic matter build-up.
- Spot cleaning any stains or spills immediately: Accidental spills, such as grease or oil, can leave unsightly stains on your landscape rocks. Quickly address these by gently scrubbing the area with a mild detergent and warm water solution. Rinse thoroughly to remove any residue.
- Applying a sealer or protective coating to maintain the rocks’ appearance: To enhance the appearance of your landscape rocks and protect them from the elements, consider applying a sealer or protective coating. This will help maintain their color and prevent fading or discoloration over time. Ensure to choose a sealer or coating that is suitable for the type of rocks you have.
- Regularly inspecting for damage or wear: Check your landscape rocks periodically for any signs of damage or wear. If you notice chipping or cracking, address it promptly to prevent further deterioration. Consider replacing any severely damaged rocks to maintain the overall aesthetic of your landscape.
- Preventing weed growth: Weeds can find their way between rocks and disrupt the clean look of your landscape. Regularly inspect the areas surrounding your rocks and remove any emerging weeds. Consider using weed barriers or applying weed-killing products to further prevent the growth of unwanted plants.
- Raking and leveling: Over time, rocks may shift or become uneven. Use a rake or your hands to level out any rocks that have moved or settled. Regularly raking your landscape rocks will also help loosen any embedded debris and keep them looking neat and well-maintained.
By incorporating these regular maintenance tips into your routine, you can keep your landscape rocks clean, vibrant, and appealing. Enjoy the natural beauty they bring to your outdoor space throughout the seasons.
Seasonal Cleaning Guidelines
Performing A Deeper Clean At The Beginning Of Each Season
Maintaining clean landscape rocks not only enhances the aesthetic appeal of your outdoor space but also helps to keep your garden healthy. While regular cleaning can keep your landscape rocks looking tidy, it is important to perform a deeper clean at the beginning of each season to ensure their longevity.
Here are some guidelines to follow:
- Clearing debris: Remove any fallen leaves, branches, or other debris that may have accumulated on the rocks during the previous season. This will prevent the organic matter from decaying and causing issues such as weed growth or pest infestation.
- Power washing: Utilize a pressure washer to give your landscape rocks a thorough clean. Start by adjusting the pressure setting to a gentle level to avoid damaging the rocks. Then, using a sweeping motion, spray the rocks to remove dirt, grime, and algae. Begin from the highest point and work your way down, ensuring all surfaces are covered.
- Scrubbing: If there are stubborn stains or accumulated dirt that the power washer couldn’t remove, scrubbing may be necessary. Mix a solution of mild soap or detergent with water and use a scrub brush or a soft-bristle brush to scrub away the dirt gently. Rinse thoroughly afterward to remove any soap residue.
- Removing weeds: Inspect the landscape rocks for any weed growth. Pull out any weeds by hand, making sure to remove the entire root system to prevent regrowth. A weed killer can also be applied to inhibit weed growth if necessary, but ensure it is safe for use around plants and the environment.
- Applying sealer: Consider applying a stone sealer after the rocks have been cleaned and dried. A sealer can help to protect the rocks from stains, weathering, and discoloration. Before applying, read the instructions carefully and ensure the rocks are completely clean and dry for optimal adhesion.
Checking For Any Damage Or Wear And Tear That May Require Repairs
Regular inspections of your landscape rocks are crucial to identify any damage or wear and tear that may require repairs. Here are some important steps to follow:
- Visual examination: Take a close look at your landscape rocks, inspecting for any cracks, chips, or signs of erosion. These issues can potentially worsen over time and compromise the integrity of the rocks, so it is important to address them promptly.
- Repairing cracks or chips: Small cracks or chips can be repaired using an epoxy or sealant specifically designed for stone repair. Follow the manufacturer’s instructions to ensure a proper application. For larger or more severe damage, it may be necessary to replace the affected rocks entirely.
- Realigning displaced rocks: Over time, landscape rocks may shift or become displaced due to factors such as heavy rainfall or foot traffic. Regularly check for any rocks that need to be realigned or reset in their designated areas. Ensure proper stability and alignment to maintain the overall look and function of your landscape.
- Addressing drainage issues: If you notice water pooling around your landscape rocks or a lack of proper drainage, it is essential to address these issues promptly. Poor drainage can lead to erosion, mold growth, or damage to the rocks themselves. Consider consulting a professional for guidance if necessary.
Regular seasonal cleaning, coupled with diligent inspections, will keep your landscape rocks in optimal condition year-round. By following these guidelines, you can ensure that your outdoor space remains visually appealing and functional, providing a beautiful setting for relaxation and enjoyment.
Frequently Asked Questions For How To Clean Landscape Rocks?
How Do You Clean Landscape Rocks?
To clean landscape rocks, start by removing large debris, then hose them down with water and scrub them with a brush. Repeat the process until they’re clean.
Can You Pressure Wash Landscape Rocks?
Yes, you can pressure wash landscape rocks. Set the pressure washer to a low setting and use a wide-angle nozzle to avoid damaging the rocks.
What Is The Best Cleaner For Landscape Rocks?
A mix of water and mild detergent is the best cleaner for landscape rocks. Avoid using harsh chemicals that could damage the rocks or plants nearby.
How Often Should Landscape Rocks Be Cleaned?
Landscape rocks should be cleaned at least once a year to remove dirt, dust, and debris that can accumulate over time.
Should You Seal Landscape Rocks?
Sealing landscape rocks can help protect them from weathering and make cleaning easier. Apply a stone sealant according to the manufacturer’s instructions.
Conclusion
To sum up, cleaning landscape rocks is not a daunting task if you follow the right process. By first removing any large debris and then using a garden hose or pressure washer, you can effectively eliminate dirt, grime, and algae from your rocks.
Depending on the level of staining, you may need to use a scrub brush or a mixture of vinegar and water to target stubborn areas. Regular maintenance is key in order to keep your landscape rocks looking their best. By implementing preventative measures such as using weed barriers and keeping the area around the rocks clean, you can minimize the need for frequent cleanings.
Remember to always prioritize safety by wearing gloves and protective eyewear while working with detergents or pressure washers. With these tips in mind, you’ll be able to maintain a beautiful and pristine landscape for years to come.