Last Updated on October 17, 2023
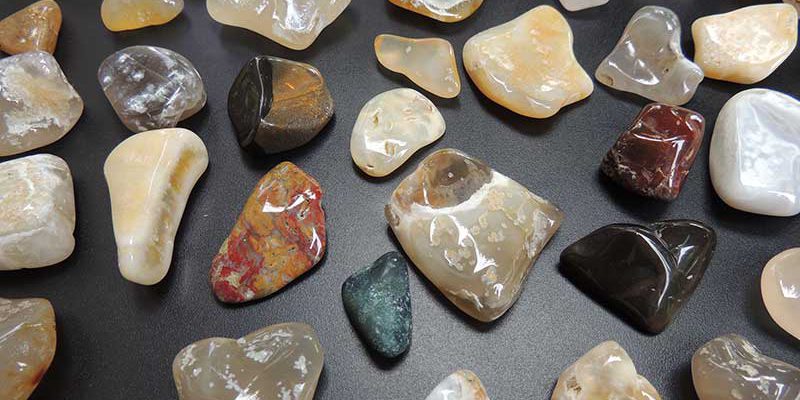
To clean rocks, you can use a mixture of water and detergent. Additionally, scrubbing with a brush can help remove any dirt or debris.
It is important to rinse the rocks thoroughly afterward to ensure all the soap is washed away. Once clean, you can let the rocks dry in the sun or use a towel to dry them manually. By following these steps, you can easily clean your rocks and keep them looking polished and fresh.

Credit: justrockhounding.com
Why Cleaning Rocks Is Essential For Their Preservation
Rocks Accumulate Dirt And Debris Over Time:
- Rocks are natural formations that can attract dirt, dust, and other debris as they are exposed to the elements over time.
- Dirt and debris can accumulate on the surface of rocks, obscuring their natural beauty and making it difficult to appreciate their unique characteristics.
Cleaning Helps To Maintain Their Appearance:
- Regular cleaning of rocks helps to keep them looking their best, preserving their natural beauty and aesthetic appeal.
- By removing dirt and debris, the true colors and textures of rocks can be revealed, allowing for a more visually pleasing display.
Proper Cleaning Prevents Damage And Deterioration:
- Cleaning rocks is not only about appearance but also about their preservation.
- Dirt and debris can contribute to the deterioration of rocks, especially when they contain minerals that are sensitive to chemicals or moisture.
- Proper cleaning techniques can help prevent further damage and ensure the longevity of rocks.
Cleaning Allows For Better Identification And Display Of Rocks:
- Dirty rocks can make it challenging to identify their unique characteristics, such as color, texture, and rock type.
- Proper cleaning techniques can help reveal these features, allowing for accurate identification and categorization.
- Clean rocks also make for better displays, whether in personal collections, museums, or educational settings, ensuring that their beauty and educational value can be fully appreciated.
Remember to handle rocks with care and follow specific cleaning methods suitable for each rock type to avoid any damage or harm. Following proper cleaning techniques will not only help preserve the appearance of rocks but also contribute to their overall longevity and appreciation.
The Impact Of Uncleaned Rocks On Their Environment
Uncleaned rocks can harbor harmful substances:
- Rocks that are not properly cleaned can contain various harmful substances such as chemical residues, pollutants, or even toxic materials.
- These substances can seep into the surrounding soil or water, posing a risk to both plants and animals in the ecosystem.
- The accumulation of such substances over time can have long-term effects on the environment.
Accumulated dirt can affect surrounding plants and animals:

- Uncleaned rocks often accumulate dirt, debris, and organic matter on their surface.
- This layer of dirt can create a barrier that hinders the natural growth and development of nearby plants.
- The accumulated dirt can also provide a breeding ground for pests and pathogens that can harm plant life in the area.
- Animals that rely on the rocks for shelter or food may also be negatively affected by the presence of dirt and contaminants.
Dirty rocks can negatively impact the overall ecosystem:
- Rocks play a crucial role in the overall balance of an ecosystem.
- When rocks are left uncleaned, the natural processes that depend on them can be disrupted.
- For example, the accumulation of dirt can affect water flow patterns, leading to erosion or changes in water quality.
- This, in turn, can have ripple effects on the entire ecosystem, impacting the organisms that rely on the rocks and the interconnected food chains.
Uncleaned rocks can have a significant impact on their environment. Not only can they harbor harmful substances, but their accumulated dirt can affect plants and animals in the surrounding area. Moreover, the overall ecosystem can be disrupted when rocks are left uncleaned.
Therefore, it is important to clean rocks properly to maintain a healthy and balanced environment.
Method 1: Dry Brushing And Dusting
Dry brushing and dusting rocks is a popular method for cleaning them, especially if they have accumulated dirt or dust. This method involves using a stiff brush to remove surface debris and a duster to gently remove finer particles. Here’s how to effectively clean rocks using dry brushing and dusting:
Materials Needed For Dry Brushing:
- Stiff brush: Opt for a brush with firm bristles to effectively remove dirt and debris from the rocks.
- Soft-bristled brush or duster: A soft-bristled brush or a duster can be used to gently remove finer particles without causing any damage.
- Gloves: It’s always a good idea to wear gloves to protect your hands while cleaning rocks.
Step-By-Step Guide For Dry Brushing:
- Start by putting on the gloves to protect your hands during the cleaning process.
- Take the stiff brush and gently scrub the rocks to remove any loose dirt or debris. Use short strokes and apply light pressure to avoid damaging the rocks.
- Pay special attention to crevices and hard-to-reach areas where dirt tends to accumulate. Use the bristles of the brush to get into those nooks and crannies.
- After dry brushing, switch to a soft-bristled brush or duster to remove finer particles. Lightly brush the surface of the rocks to remove any remaining dust or dirt.
- If you come across stubborn stains or sticky residue, you can dampen the stiff brush slightly and continue brushing. However, ensure that the rocks are suitable for moisture before doing this.
- Once you are satisfied with the cleaning, inspect the rocks to see if any dirt or dust remains. If necessary, repeat the dry brushing and dusting process until the rocks are clean.
Benefits And Limitations Of This Method:
Using the dry brushing and dusting method for cleaning rocks offers several advantages, as well as a few limitations to consider:
Benefits:
- It is a simple and cost-effective method that requires minimal materials.
- Dry brushing helps preserve the natural appearance of rocks.
- It is a gentle cleaning method suitable for fragile rocks.
- Dry brushing can be done indoors without the need for water or cleaning solutions.
Limitations:
- This method may not be effective for removing tough stains or encrusted dirt.
- Large or heavy rocks may require more effort and time to clean thoroughly.
- Dry brushing cannot disinfect rocks; it only removes surface dirt and dust.
- Delicate rocks with loose or crumbling surfaces may not withstand the brush’s pressure.
By following the step-by-step guide and considering the benefits and limitations, you can effectively clean rocks using the dry brushing and dusting method. Remember to handle the rocks with care and adapt the technique according to their specific characteristics.

Method 2: Water And Mild Soap Solution
Rock cleaning with a water and mild soap solution is an effective method to remove dirt, grime, and other contaminants from your rocks. This technique is particularly useful for rocks that are not highly sensitive to water or overly fragile.
Follow these steps to clean your rocks effectively:
Preparing The Soap Solution
To start with, prepare a mild soap solution using the following steps:
- Fill a bucket or basin with lukewarm water.
- Add a few drops of mild dish soap to the water.
- Gently stir the mixture until the soap dissolves completely.
Proper Techniques For Washing Rocks With Soap Solution
Once your soap solution is ready, use the following techniques to wash your rocks safely and efficiently:
- Submerge the rocks into the soap solution, ensuring that they are fully covered.
- Use a soft-bristled brush or an old toothbrush to gently scrub the rocks. Avoid using brushes with hard bristles to prevent scratching the surface of the rocks.
- Pay extra attention to any stubborn stains or spots, gently scrubbing in a circular motion until they are removed.
- Rinse the rocks thoroughly with clean water to remove any soap residue.
- Inspect the rocks for any remaining dirt or debris. If necessary, repeat the process until the rocks are completely clean.
Drying And Storing Cleaned Rocks
After washing your rocks, it’s essential to dry and store them properly to maintain their quality. Follow these steps for drying and storing cleaned rocks:
- Place the washed rocks on a clean towel or paper towels to air dry. Avoid using heat sources or direct sunlight to speed up the drying process, as this can cause the rocks to become brittle or crack.
- Once the rocks are dry, inspect them for any moisture or remaining dirt.
- If the rocks are completely dry and free from debris, you can store them in a cool, dry place. Consider using a labeled container or resealable plastic bags to keep them organized and protected from dust or other contaminants.
Remember, different types of rocks may require specific cleaning methods and precautions. Always research and consider the specific needs of your rocks before cleaning them to avoid any damage. With the water and mild soap solution method, you can effectively clean a variety of rocks and enjoy their natural beauty.
Method 3: Chemical Cleaners
Chemical cleaners can be an effective way to clean rocks, especially when dealing with tough stains or stubborn dirt. However, it is important to choose the right type of cleaner and follow safety precautions to avoid any damage to your rocks or harm to yourself.
Here’s everything you need to know about using chemical cleaners to clean rocks:
Types Of Chemical Cleaners Suitable For Rocks:
- Acidic cleaners: Acidic cleaners such as vinegar or lemon juice can be used to remove mineral deposits or rust stains from rocks. These natural cleaners are safe to use and can effectively dissolve unwanted buildup on your rocks. Simply apply the acid directly to the stain, let it sit for a few minutes, then rinse off with water.
- Mild detergent: A mild detergent mixed with water can help remove dirt and grime from rocks. Use a soft brush or cloth to gently scrub the rocks with the soapy solution. Rinse thoroughly with water to remove any residue.
- Oxalic acid: Oxalic acid is a powerful cleaner that can be used to remove tough stains like iron or calcium deposits from rocks. However, it should be used with caution as it can be harmful if ingested or inhaled. Always wear protective gloves and goggles when working with oxalic acid, and follow the manufacturer’s instructions carefully.
Safety Precautions When Using Chemical Cleaners:
- Wear protective gear such as gloves and goggles to prevent direct contact with the chemicals.
- Work in a well-ventilated area to avoid inhaling any fumes or vapors.
- Read and follow the instructions provided by the manufacturer to ensure safe and effective use of the chemical cleaner.
- Keep children and pets away from the cleaning area to avoid any accidental exposure.
Step-By-Step Instructions For Using Chemical Cleaners:
- Choose the appropriate chemical cleaner based on the type of stain or dirt on your rocks.
- Prepare the cleaning solution according to the instructions provided.
- Wear protective gear, including gloves and goggles, before handling the chemical cleaner.
- Apply the cleaner directly to the stain or dirt on the rock’s surface.
- Allow the cleaner to sit for the recommended amount of time, usually a few minutes.
- Gently scrub the rock using a soft brush or cloth to loosen the dirt or stain.
- Rinse the rock thoroughly with clean water to remove any residue from the cleaner.
- Repeat the process if necessary to achieve the desired level of cleanliness.
- Dispose of any leftover chemical cleaner according to local regulations.
- Store the chemical cleaner in a safe place, away from children and pets.
Cleaning rocks with chemical cleaners can be an effective solution for stubborn stains or heavy dirt. However, always handle these cleaners with care and follow the safety precautions to ensure the best results without causing any harm to yourself or your precious rocks.
Method 4: Natural Cleaning Methods
If you prefer using natural cleaning methods to clean your rocks, there are a few options you can try. Vinegar or lemon juice, baking soda, and some helpful tips can go a long way in getting your rocks looking their best.
Using Vinegar Or Lemon Juice For Cleaning Rocks:
- Vinegar or lemon juice can be effective in removing dirt, grime, and mineral deposits from rocks.
- Soak the rocks in a solution of equal parts vinegar or lemon juice and water for 30 minutes to an hour.
- Scrub the rocks gently with a soft-bristled brush to remove any remaining dirt.
- Rinse the rocks thoroughly with water to remove any residue.
- Let the rocks dry completely before displaying or using them.
- Note: Avoid using vinegar or lemon juice on rocks that have a high mineral content, as it may damage the surface.
Utilizing Baking Soda For Tough Stains:
- Baking soda is a versatile cleaning agent that can help remove tough stains and odors from rocks.
- Make a paste by mixing baking soda with a small amount of water.
- Apply the paste to the stained areas on the rocks and let it sit for a few minutes.
- Gently scrub the stained areas with a soft brush or toothbrush.
- Rinse the rocks thoroughly with water to remove any residue.
- Repeat the process if necessary until the stains are removed.
- Dry the rocks completely before using or displaying them.
Tips For Using Natural Cleaning Methods Effectively:
- Always test a small, inconspicuous area of the rock before applying any cleaning solution to ensure it does not cause damage.
- Use a soft-bristled brush or toothbrush to avoid scratching the surface of the rocks.
- Rinse the rocks thoroughly after cleaning to remove any residue or cleaning solution.
- Allow the rocks to dry completely before storing or using them.
- Be cautious when using natural cleaning methods on rocks with delicate or porous surfaces.
- If you are unsure about the suitability of a particular cleaning method for your rocks, consult with a professional or seek expert advice.
With these natural cleaning methods, you can safely and effectively clean your rocks, restoring their natural beauty and shine. Remember to exercise caution and test cleaning solutions before applying them to your rocks. Happy cleaning!
Proper Storage And Display Techniques
Whether you are a seasoned rock collector or just starting out with your precious collection, proper storage and display techniques are essential for preserving the beauty and integrity of your rocks. In this section, we will explore the importance of choosing the right storage containers, display ideas for showcasing rocks, and preventing dirt and dust accumulation during display.
Choosing The Right Storage Containers:
- Clear plastic or glass containers: These containers allow for easy visibility of your rocks, and they protect them from dust and dirt. Make sure the containers have tight-fitting lids to prevent unwanted particles from entering.
- Acid-free paper or foam inserts: Placing acid-free paper or foam inserts in the containers helps to cushion and protect your rocks from any potential damage.
- Labeling: Assigning labels to your storage containers helps you locate specific rocks easily. Use waterproof and fade-resistant labels to ensure their longevity.
Display Ideas For Showcasing Rocks:
- Shelving units: Install shelving units in a well-lit area where your rocks can be displayed prominently. Arrange them by size, color, or type, creating an aesthetically pleasing arrangement.
- Individual stands or pedestals: Displaying rocks individually on stands or pedestals enhances their visual impact. You can choose stands made from wood, acrylic, or metal, depending on your preference.
- Shadow boxes: Shadow boxes are an excellent choice for displaying a curated selection of rocks. Fill them with a layer of fine silica sand or colored fabric to add depth and accentuate the rocks’ features.
- Wall-mounted frames: Consider using wall-mounted frames with glass fronts for a unique display. Arrange rocks in an artistic pattern or create a themed display to add visual interest to any room.
Preventing Dirt And Dust Accumulation During Display:
- Regular dusting: Dust your displayed rocks regularly using a soft brush or feather duster to prevent the buildup of dirt and dust particles.
- Protective covers: If your display area is prone to excessive dust, consider using transparent acrylic covers or glass cloches to protect your rocks from airborne particles. Ensure proper ventilation to prevent condensation.
- Displaying in closed cabinets: If you want to keep your rocks protected from dust while still showcasing them, consider displaying them in closed cabinets with glass fronts. This keeps them safe from dirt without compromising visibility.
Remember, proper storage and display techniques not only help to preserve the beauty of your rocks but also allow you to enjoy and share your collection with others. By following these guidelines, you can ensure that your rocks remain in pristine condition for years to come.
Happy rock collecting!
Regular Cleaning Schedule And Maintenance
Establishing A Routine For Rock Cleaning:
Regular cleaning is essential to maintain the beauty and longevity of your rocks. By establishing a routine for rock cleaning, you can ensure that your rocks are always looking their best. Here are some tips to help you create a regular cleaning schedule and maintain the cleanliness of your rocks:
- Frequency of cleaning: Depending on the location and exposure of your rocks, you may need to clean them monthly, quarterly, or annually. Assess the dirt, debris, and weathering on your rocks to determine the appropriate cleaning frequency.
- Cleaning method selection: Different types of rocks require different cleaning methods. Before starting the cleaning process, understand the composition of your rocks and consult a professional or do some research to determine the best cleaning method to avoid any damage.
- Gentle cleaning techniques: When cleaning your rocks, it’s important to use gentle techniques to avoid causing any harm. Avoid using harsh chemicals, abrasive tools, or excessive force. Opt for a soft bristle brush or sponge with mild soap and water to gently remove dirt and stains.
- Protective gear: If you’re using cleaning agents, be sure to protect yourself by wearing gloves and safety goggles. Some cleaning products may contain hazardous ingredients, so always read and follow the manufacturer’s instructions.
- Thorough rinsing: After cleaning your rocks, be sure to rinse them thoroughly with clean water. This will help remove any soap residue or cleaning agents that could potentially harm the rocks over time.
Inspecting Rocks For Any Signs Of Damage Or Deterioration:
Regular inspections play a crucial role in maintaining the health and condition of your rocks. By carefully examining your rocks for signs of damage or deterioration, you can take proactive measures to prevent further issues. Here are some key points to consider during rock inspections:
- Cracks or fractures: Look for any cracks or fractures on the surface of the rocks. These can weaken the overall structure and may need professional repairs to prevent further damage.
- Discoloration or fading: Check if your rocks have any discoloration or fading. This could be a sign of weathering or the presence of harmful elements. Take preventive action to protect your rocks from further damage.
- Chipping or peeling: Inspect the edges of your rocks for any signs of chipping or peeling. This may indicate that the protective coating or sealant needs to be reapplied.
- Mold or algae growth: Keep an eye out for any mold or algae growth on the surface of your rocks. These organisms can weaken the rocks over time. Use appropriate cleaning methods to remove them and take preventive measures to inhibit their growth.
Taking Preventive Measures To Maintain Clean Rocks:
Maintaining clean rocks goes beyond regular cleaning and inspections. By implementing preventive measures, you can minimize the accumulation of dirt, damage, and deterioration. Here are some preventive steps you can take:
- Sealing or coating: Consider applying a protective sealant or coating to your rocks. This can act as a barrier against dirt, moisture, and uv rays, preventing them from causing damage or discoloration.
- Proper drainage: Ensure that your rocks have proper drainage to prevent water from pooling and causing erosion or mold growth. Properly designed drainage systems can help keep your rocks clean and in good condition.
- Avoid placing objects directly on rocks: Placing objects directly on your rocks, such as planters or heavy decorations, can cause pressure points and damage the surface. Use protective pads or stands to distribute the weight evenly.
- Regular maintenance: Besides cleaning and inspections, regular maintenance tasks like trimming nearby plants, removing fallen leaves, and addressing any drainage issues can help keep your rocks clean and free from potential harm.
- Educate others: If you have rocks in public spaces or gardens, consider placing informative signs or tags to educate visitors on proper care and maintenance. This can help prevent accidental damage caused by visitors.
Remember, by establishing a routine for rock cleaning, inspecting rocks for any signs of damage or deterioration, and taking preventive measures, you can ensure that your rocks remain clean and beautiful for years to come. Keep in mind the specific needs of your rocks and consult experts when needed for better guidance.
Safely Handling Rocks During Cleaning
When it comes to cleaning rocks, it is important to prioritize your safety. Handling rocks can be tricky, especially if they are fragile or sharp. To ensure you clean rocks without harm, follow these safety guidelines:
Wearing Protective Gloves And Goggles
To protect your hands and eyes during the cleaning process, it is crucial to wear protective gloves and goggles. These safety gears will shield you from any potential injuries caused by sharp edges or chemical exposure. Remember, prevention is better than cure.
- Gloves: Use sturdy rubber or leather gloves to safeguard your hands from cuts, abrasions, or chemical irritations.
- Goggles: Protect your eyes from flying debris or splashes by wearing safety goggles. This will minimize the risk of eye-related injuries.
Using Appropriate Tools For Handling Rocks
To ensure a safe and effective cleaning process, utilize the right tools for handling rocks. Choosing appropriate tools will help you handle rocks with ease and prevent any accidents that may occur due to mishandling.
- Tongs: Use tongs with padded jaws to pick up and move rocks. This will provide a secure grip without damaging the surface or structure of the rocks.
- Brushes: Employ soft-bristled brushes or toothbrushes to gently clean the surfaces of rocks. This will help remove dirt, debris, or loose particles without causing any damage.
Precautions For Handling Fragile Or Sharp Rocks
If you’re dealing with fragile or sharp rocks, it is essential to exercise additional caution to avoid any mishaps during the cleaning process. Fragile rocks can break easily, while sharp rocks can cause injuries. Take the following precautions:
- Supportive surface: Place a soft and supportive material, like a towel or foam, underneath fragile rocks to prevent them from cracking or breaking when handled.
- Avoid direct handling: If a rock has sharp edges or protruding spikes, minimize direct contact by using tools like tongs or brushes to clean them. This will reduce the risk of accidental cuts or punctures.
Remember, the safety of both yourself and the rocks should always be top priority during the cleaning process. By following these guidelines, you can handle rocks safely and achieve successful cleaning results.
Engaging In The Rock Cleaning Community
Are you fascinated by the beauty and intricacy of rocks? Do you enjoy finding and collecting unique specimens? Engaging in the rock cleaning community can enhance your rock collecting experience and provide valuable knowledge and resources. Whether you’re a beginner or an experienced rock enthusiast, joining clubs or forums, sharing experiences, and participating in events or workshops can offer exceptional opportunities for learning and connecting with like-minded individuals.
Joining Rock Collecting Clubs Or Forums:
- Connect with fellow rock enthusiasts who share your passion for rocks and minerals.
- Engage in discussions and gain insights into various rock cleaning techniques.
- Learn about the best tools and equipment for rock cleaning and preservation.
- Get access to exclusive rock collecting resources and information.
- Find mentors and experienced collectors who can provide guidance and support.
Sharing Experiences And Learning From Others:
- Exchange stories and knowledge about rock cleaning methods and experiences.
- Learn from the experiences of seasoned collectors and gain insights into their techniques.
- Seek advice and troubleshoot challenges you may encounter during the cleaning process.
- Discover new rock cleaning techniques and innovative approaches.
- Create connections and expand your network within the rock cleaning community.
Participating In Rock Cleaning Events Or Workshops:
- Attend workshops or events focused on rock cleaning and preservation.
- Learn hands-on techniques from experts in the field.
- Discover new methods, tools, and tips for efficient and effective rock cleaning.
- Engage in group activities and collaborate with fellow rock enthusiasts.
- Share your own experiences and techniques with others.
Engaging in the rock cleaning community can be a rewarding experience that enhances your knowledge, skills, and enjoyment in the world of rock collecting. By joining clubs or forums, sharing experiences, and participating in events or workshops, you can connect with others who share your passion, learn new techniques, and expand your horizons in the fascinating world of rocks.
So why wait? Dive into the rock cleaning community and unlock a world of opportunities!
Frequently Asked Questions For How To Clean Rocks?
How To Clean Rocks Using Household Items?
You can clean rocks at home using household items like vinegar, water, and a scrub brush.
What Is The Best Way To Clean Outdoor Rocks?
To clean outdoor rocks, use a mixture of bleach and water. Scrub the rocks with a brush and rinse thoroughly.
Can I Clean Rocks With Pressure Washer?
Yes, you can clean rocks with a pressure washer. Use a low-pressure setting to avoid damaging the rocks.
How Often Should I Clean My Rock Collection?
You should clean your rock collection every few months to remove dust and maintain their appearance.
Are There Any Natural Methods To Clean Rocks?
Yes, you can use natural methods like soaking rocks in lemon juice or using a baking soda paste for effective cleaning.

Conclusion
To sum up, regular maintenance and cleaning of rocks is essential to preserve their beauty and longevity. By following the simple steps outlined in this guide, you can ensure that your rocks remain vibrant and free from dirt and debris.
Remember to thoroughly clean and dry your rocks before displaying them, as moisture can lead to discoloration and mold growth. Use gentle tools and materials to avoid damaging the rocks, and consider using natural cleaning solutions for a more eco-friendly approach.
Additionally, keeping your rocks away from direct sunlight and harsh weather conditions will help maintain their appearance. So, with a little bit of effort and the right techniques, you can enjoy the natural beauty of your rocks for years to come.